Goal: To add the TikTok tracking pixel to your site.
Ideal Outcome: The TikTok pixel is properly installed without any technical issues.
Prerequisites or Requirements:
- Access to an active TikTok for Business account.
- Access to Google Tag Manager (GTM) set up on your website.
Make sure you have an account on TikTok For Business by clicking this link.
If you haven’t set up Google Tag Manager, refer to the following SOPs:
- SOP 004 (web version) to Set up Google Tag Manager on WordPress
- SOP 065 (web version) to Set up Google Tag Manager on Shopify
- SOP 066 (web version) to Set up Google Tag Manager on Squarespace
Why This Is Important: The TikTok Pixel enables tracking of visitors from TikTok ad campaigns and their actions on your website, facilitating audience segmentation and retargeting.
Where This Is Done: In Google Tag Manager and TikTok Ads Manager.
When This Is Done: Before running any TikTok advertising campaign on your website. Typically performed once unless running TikTok ads on multiple websites.
Who Does This: The person responsible for website management, analytics, or paid advertising.
Environment Setup:
Before you start:
- Open a new browser window with your TikTok and Google Tag Manager accounts signed in.
- Download the TikTok Pixel helper.
Installing TikTok Pixel via Google Tag Manager:
- Once signed in, head to Events manager.

- Click on Website Pixel.

- Select the Create Pixel button. A pop-up will appear:

-
- Give your Pixel a name.
- Choose “Install Pixel code using a third-party tool.”
- Click “Next”.

- Select Google Tag Manager and click next.

- Click Connect to a Google Account.
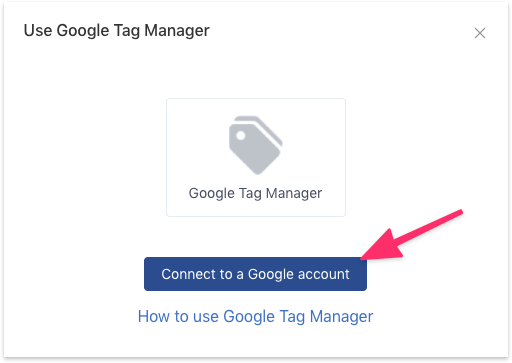
- Log in to your Google account, ensuring all Google Tag Manager permissions are checked.

- Your Google Tag Manager details will be automatically populated. Ensure you are selecting the correct Account and Container, then click “Next”.

- You have now successfully installed the TikTok Pixel via Google Tag Manager. Clicking Complete will redirect you to the Pixel dashboard.
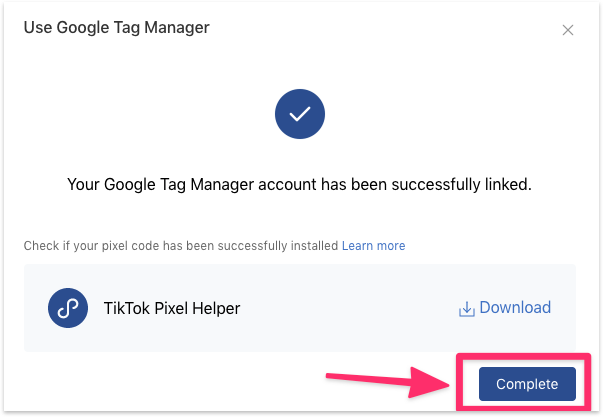
Create a Page View Event:
- Click on Complete Pixel Setup from the Pixel Dashboard.

- Select Standard Mode.
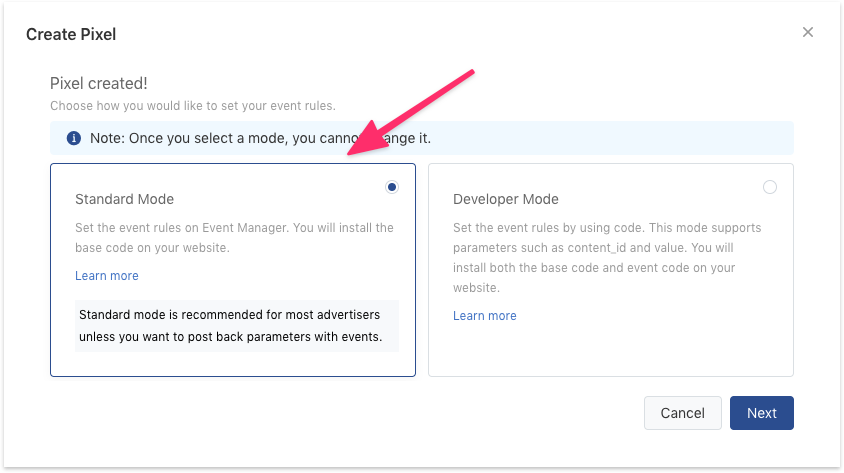
- In the next screen, click “Complete & Set Rules”.

- Select Custom Events.

- Since this is an event to track page views, select the appropriate pixel settings and click next.
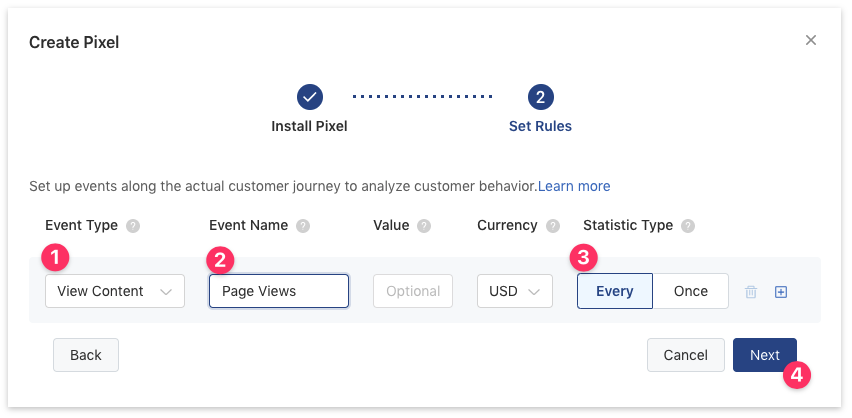
- Select “Destination URL”, this will be where you will be firing your event.

- Add a page browsing rule.

- Since you’re tracking all page views, add the rule: “Page URL” “Contains” “[Insert your homepage URL]”, then hit “Save & Complete”.
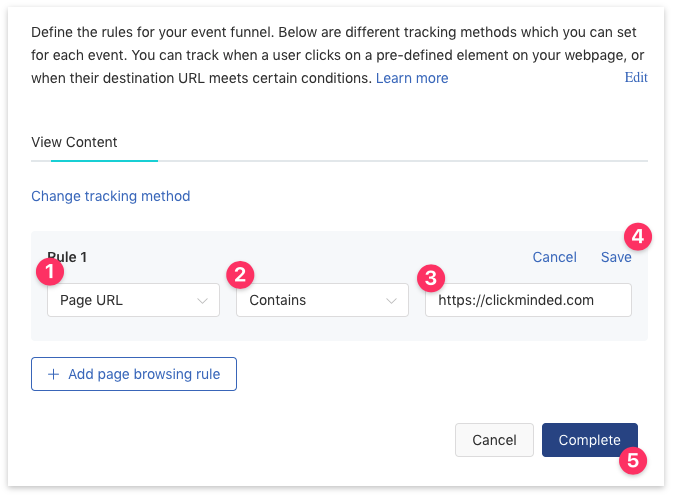
- You’ll be redirected back to the dashboard with the Page Views event successfully created.

Verifying the TikTok and Event Pixels Are Installed Correctly:
- It takes about 15-30 minutes for both Google Tag Manager and TikTok’s event pixel to start sending signals.
- Head over to your website after 30 mins and refresh a couple of times for the event pixel to kick in.
- Click the TikTok Pixel helper in your Google Chrome toolbar to confirm both the TikTok and Event pixels are now tracked.
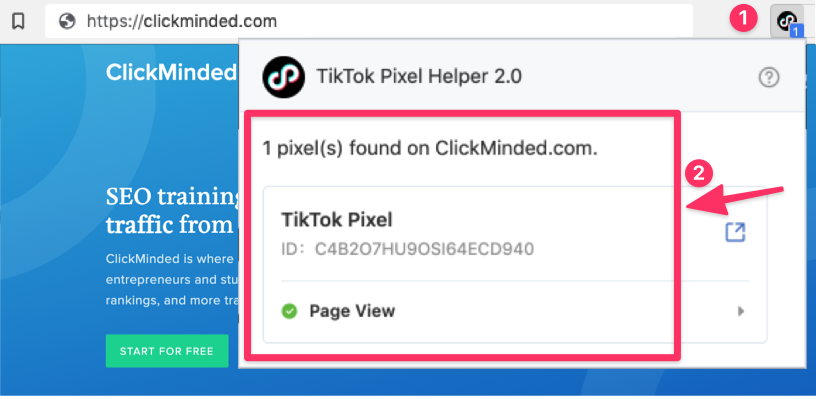
- Now head back to TikTok’s Event Manager and you’ll see the page view metrics are now tracked.


