Goal: Add the Facebook pixel to your website to ensure maximum performance.
Target: The Facebook pixel should install without a hitch and without any technological difficulties.
Requirements: Make sure Google Tag Manager has already been installed on your website. In addition, use Business Manager to create a Facebook Ads account (Link).
Significance: An essential element for successful Facebook advertising is the Facebook Pixel. It makes it easier to build up campaign conversions and allows the creation of remarketing audiences.
Note: If you are using Shopify, skip this SOP and go to SOP 068: How to Add a Facebook Pixel to a Shopify Store.
Location: Both your Facebook Ads management and Google Tag management are where configuration takes place.
Frequency: This procedure is carried out only once, at the time of the first Facebook pixel installation.
Accountability: Assigned to those in charge of sponsored advertising, analytics, or website administration.
Configuring the Environment
Crucial:
- This SOP explains how to use Google Tag Manager—the programme we suggest using to add and manage tracking codes to your website—to install the Facebook Pixel. Check out our Google Tag Manager Installation SOPs for WordPress or Squarespace if you haven’t yet integrated Google Tag Manager into your website.
- This SOP should not be followed if you are using Shopify; instead, adhere to SOP 068: How to Add a Facebook Pixel to a Shopify Store.
- Prior to doing this, you ought to have set up or gained access to a Facebook Business Manager account for your organisation.
Prior to beginning:
- Install the Chrome Extension for Facebook Pixel Helper.
Setting up the Facebook Pixel
- Open Facebook and log in.
- Open Facebook Business Manager by navigating there.
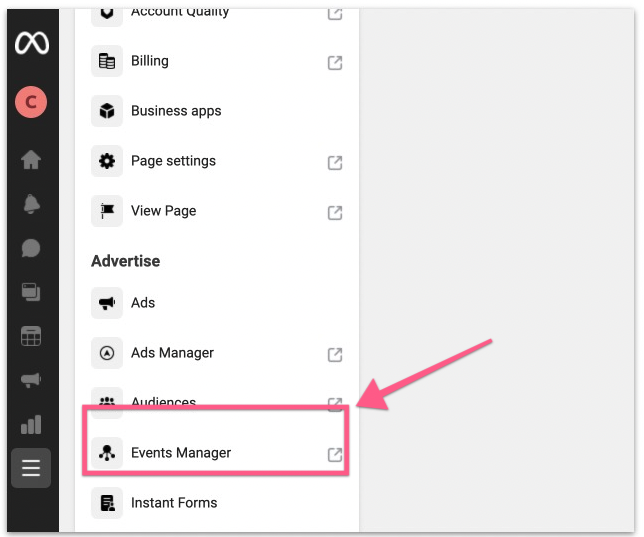
- Choose “All tools” ➝ “Events Manager” from the sid
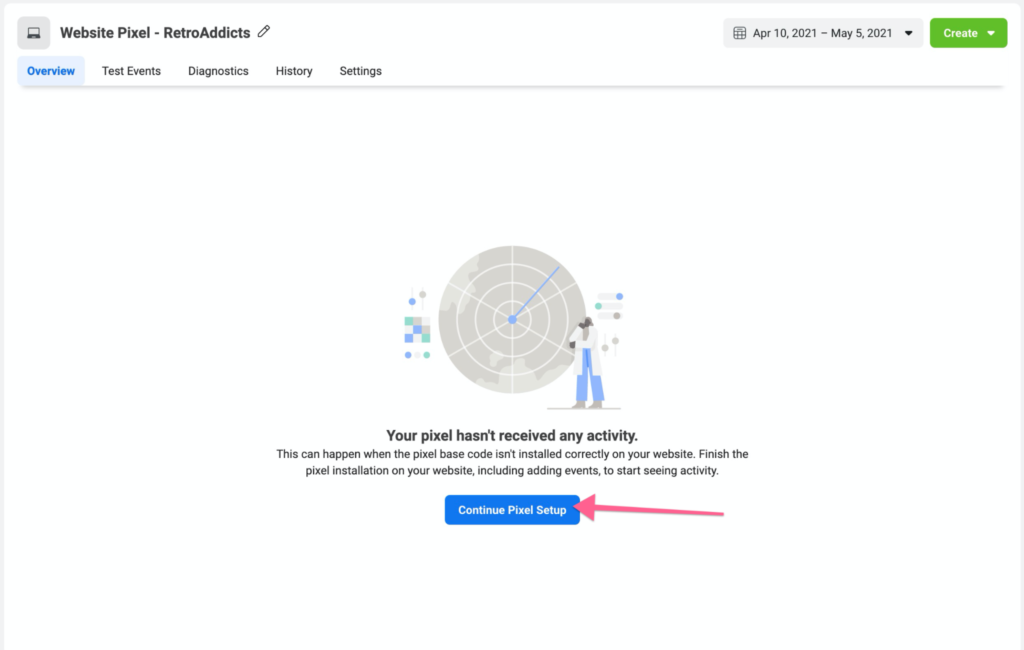
- Click “Continue Pixel Setup” after selecting the Pixel from the list on the left if it has already been produced but hasn’t been installed (then go to step 7).
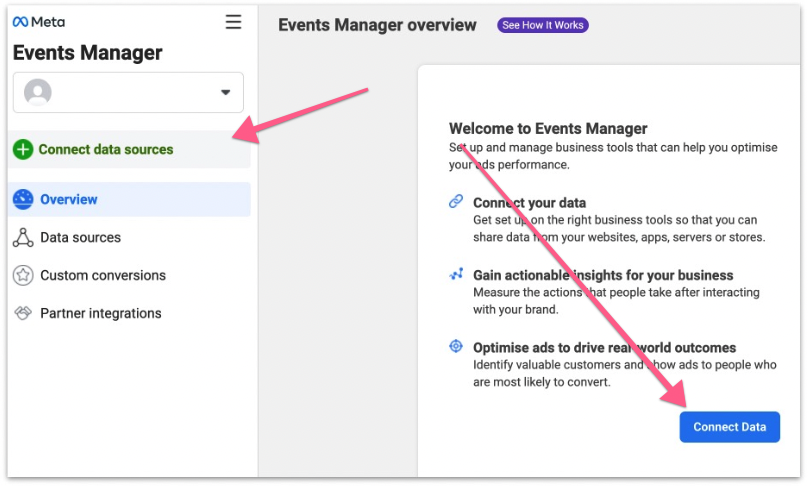
- In case this is your first time generating a Pixel, select “Connect Data Sources” or “Connect Data.”
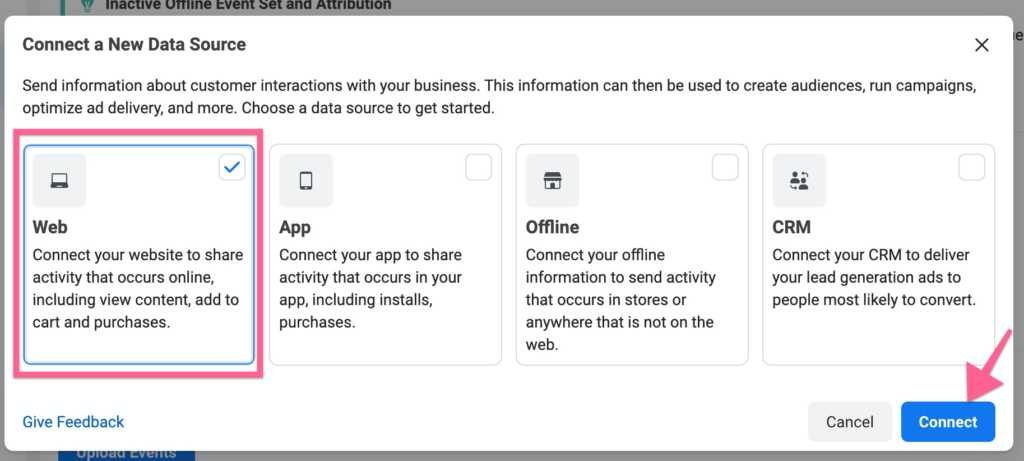
- Select “Web” from the drop-down menu and press “Connect.”
- “Meta Pixel” is the option; click “Connect.” In the event that “Meta Pixel” is not displayed, select “Facebook Pixel.”

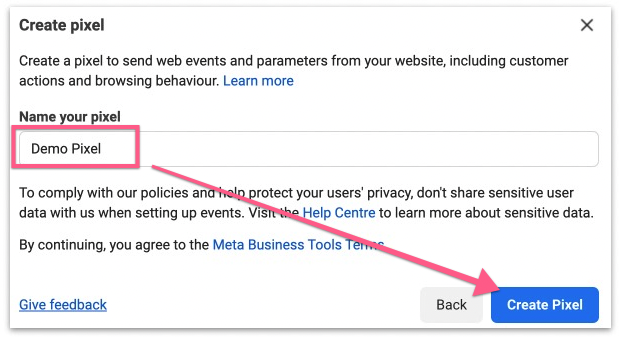
- After giving your pixel a name, select “Create Pixel.”
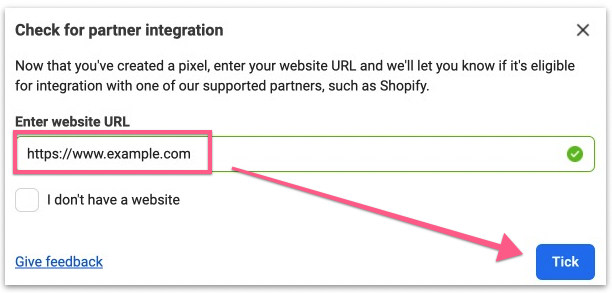
- Add the URL of your website and select “Tick.”
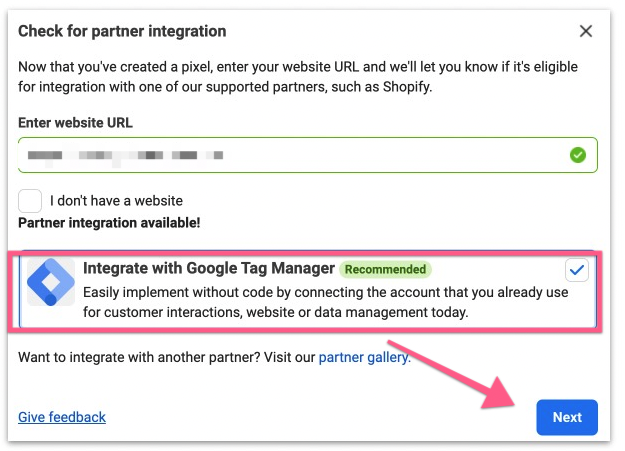
- In the event that your website has Google Tag Manager installed, choose the Google Tag Manager option and press “Next.”
- Click “Continue” to verify that your pixel has been configured on the next screen.
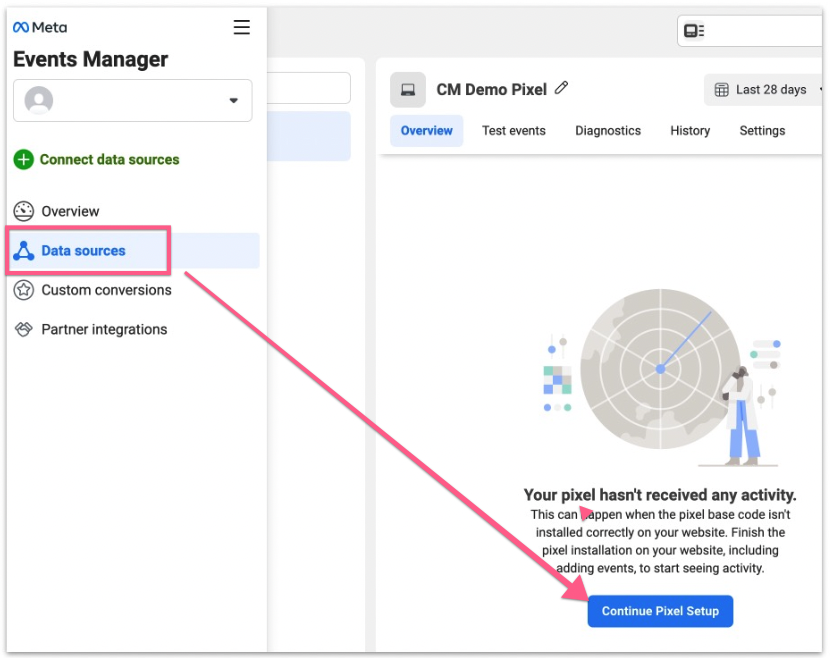
- Once “Data sources” has been chosen from the sidebar, click “Continue Pixel Setup.”
- You’re going to see two choices: Either manually incorporate partner integration into the website, or 2) use pixel code. Please select “Check for Partner.”
- Select the partner “Google Tag Manager” option.
- To connect your Google Tag Manager account to Facebook, follow the onboarding protocol. Press “Next” on the initial display.
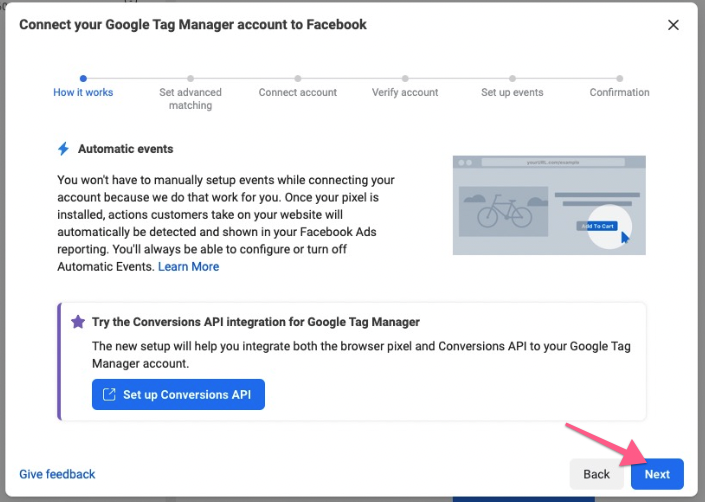
- Choose whether or not to activate “Advanced Matching.” If you’re not familiar with Google Tag Manager, click “Next” and leave it “Off.”

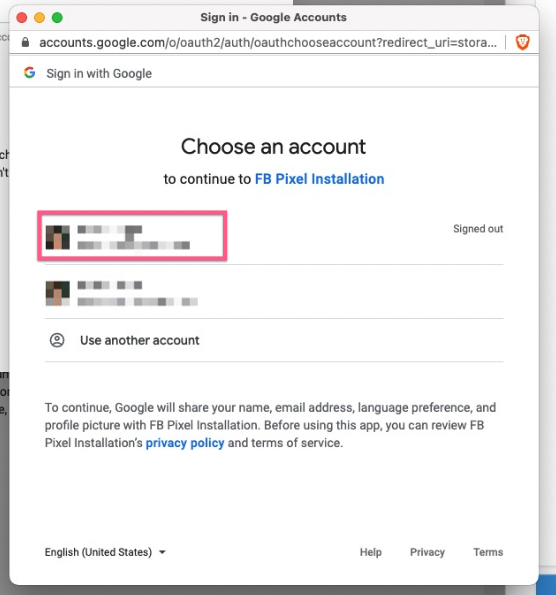
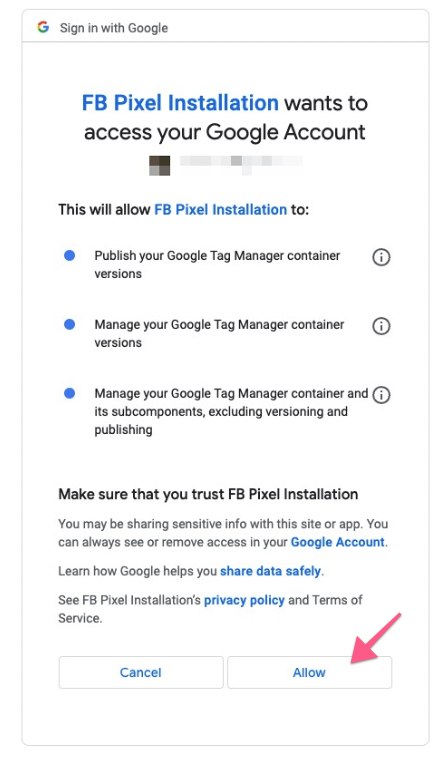
- Log in to the Google Account linked to Google Tag Manager and allow Facebook to make modifications.
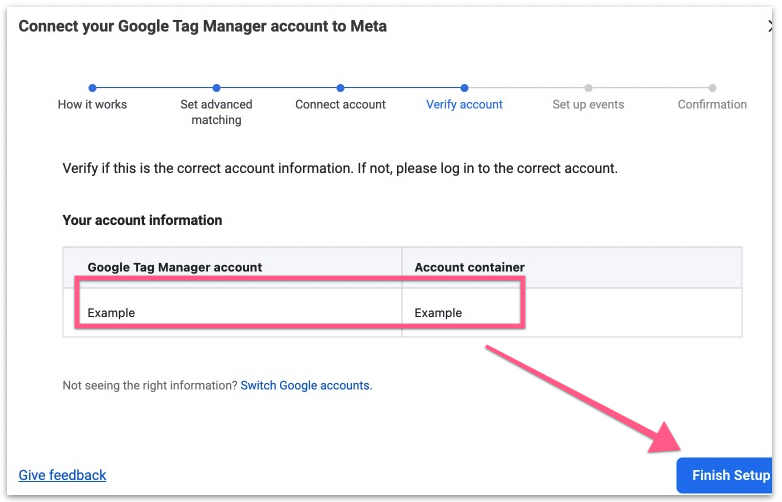
- Check that the Google Tag Manager account and container information are correct. After verification, select “Finish Setup.”
- To add events, you can optionally use the Event Setup Tool. For now, choose “Next” to continue.
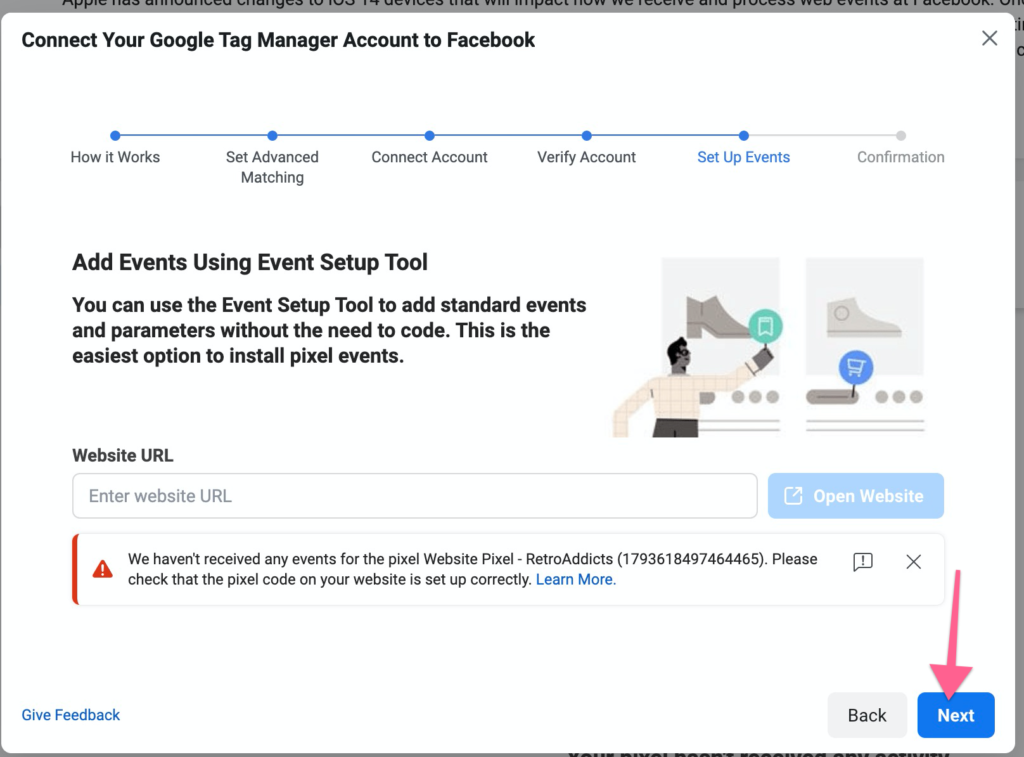
- Given that the pixel was just placed, a warning saying that it hasn’t received any events may occur. This SOP will undergo verification at a later time.
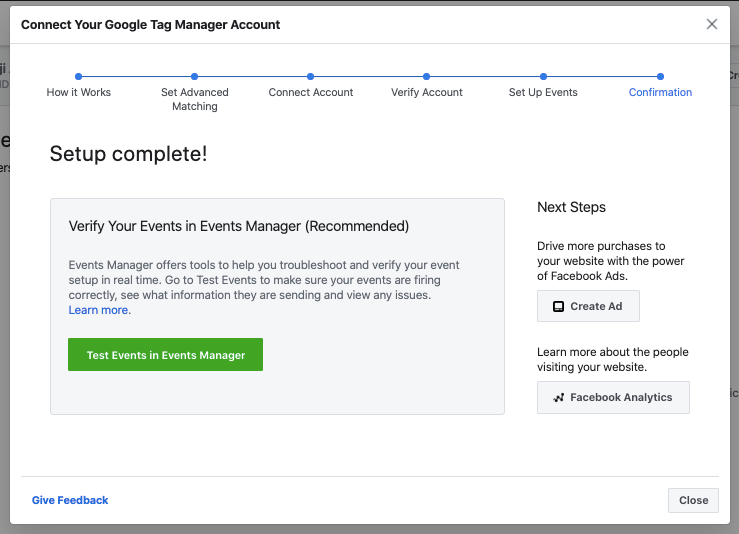
- Verify the setup’s completion using the screen that is presented.
Assurance of Quality for the Facebook Pixel
- Launch Chrome and navigate to your website.
- Make use of the Facebook Pixel Assistance Chrome addon.

- Check to see if your Facebook Pixel installation went smoothly. At least one pixel should be detected by the extension, and its Pixel ID should match the one in your Facebook Business Manager.