The aim of this task is to create a Facebook Ad account and a Business Manager account for your company.
Goal: Upon completion of this step, you will have established your Facebook Ad Account and selected your chosen payment method, in addition to having a fully functional Business Manager account that can effectively manage all of your Facebook assets.
Required conditions: You must have a personal Facebook account.
Significance: Facebook’s Business Manager makes it easy to manage several pages and ad accounts, and it also gives you the benefit of safely designating roles to your workers or contractors. Campaigns can be launched against the 3.05 billion monthly and 2.09 billion daily active users as of 2024 thanks to the Facebook Ad account.
Location: The entire process takes place within Facebook’s Business Manager.
Timing: This should be executed the first time you create a Business Manager account.
Responsible Party: The responsibility falls on the business owner or the individual entrusted with overseeing paid advertising on behalf of the business.
Create an Account in Business Manager:
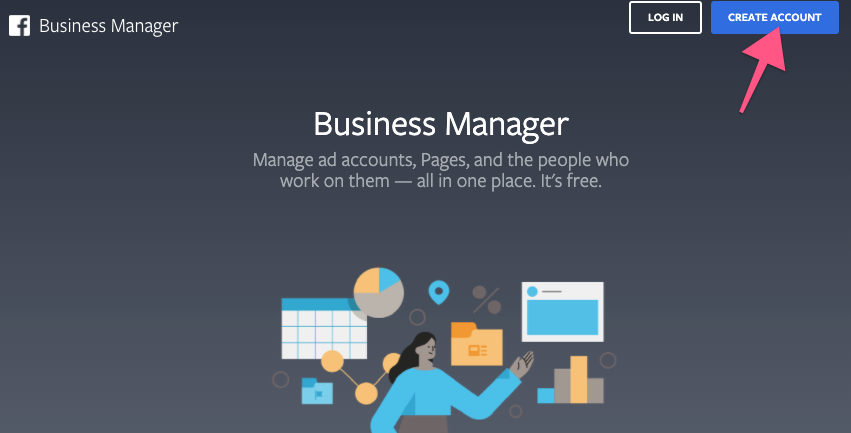
- In your browser, go to https://business.facebook.com.
- Select “Create Account” which is located in the upper right corner.
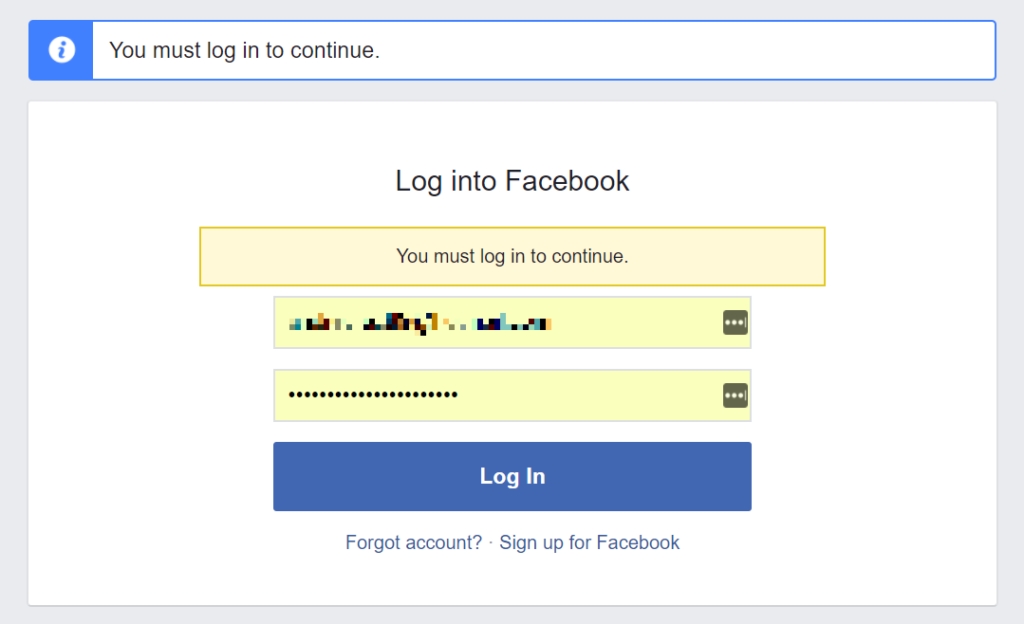
- Please log in if you are not already logged into your own Facebook account.
- Account Creation for Business Managers:
- Enter the name of your business.
-
- Note: Employees or authorised personnel in charge of your assets might see this name.
- After entering your name and company email and clicking “Continue,” select “Submit.”
-

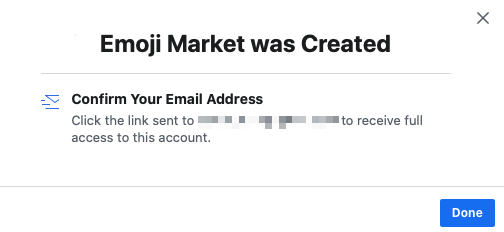
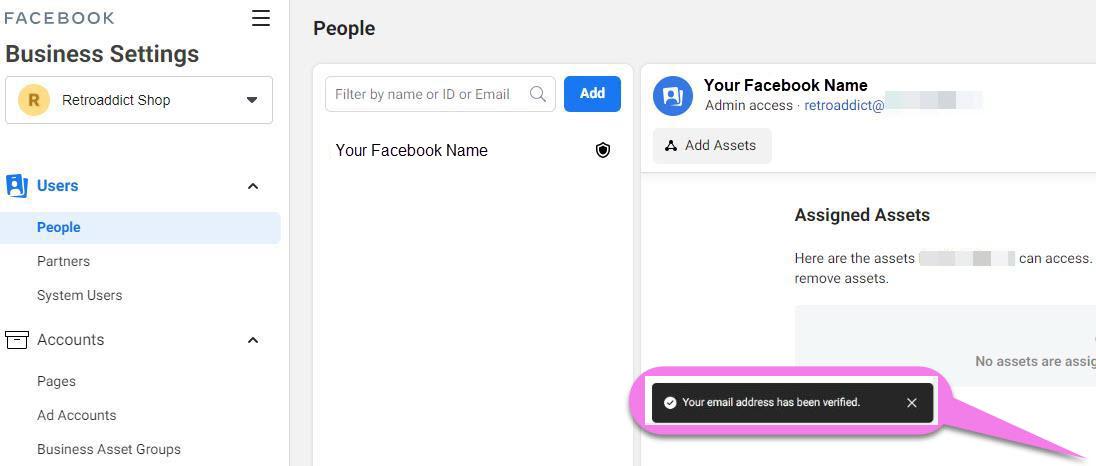
- It has now built your business manager! To validate your account, click the link that was sent to you by email.
- Following confirmation, the following screen will appear in your Business Manager configuration, with your email verified at the bottom right corner:
Sign up for a Business Manager Ad Account
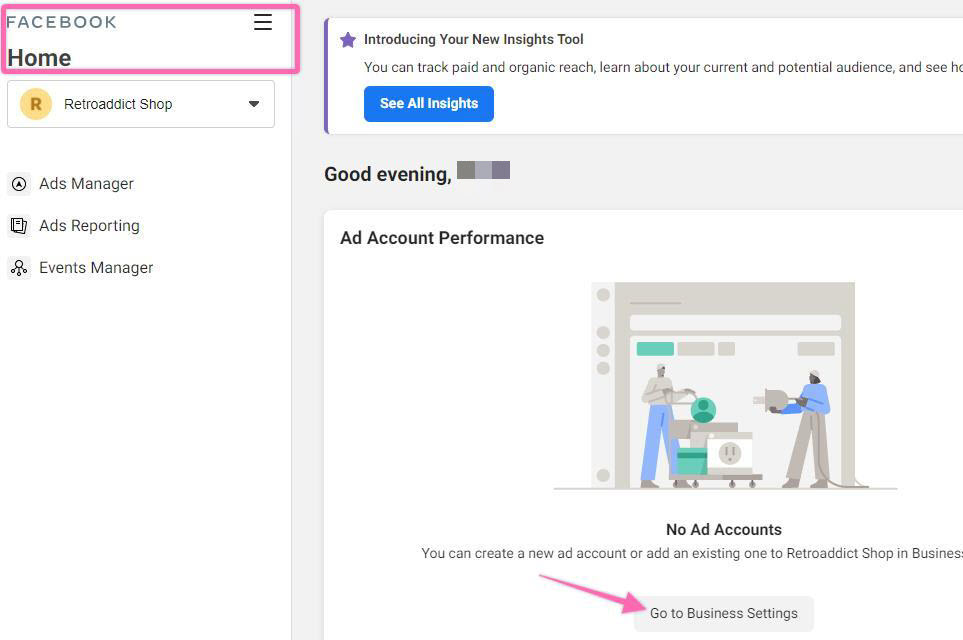
- Click “Go to Business Settings” when you are on the Business Manager Home page.
- Select the ‘Add’ dropdown menu:
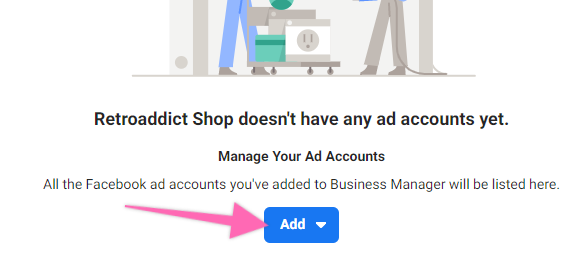
- On “Create a New Ad Account,” click.

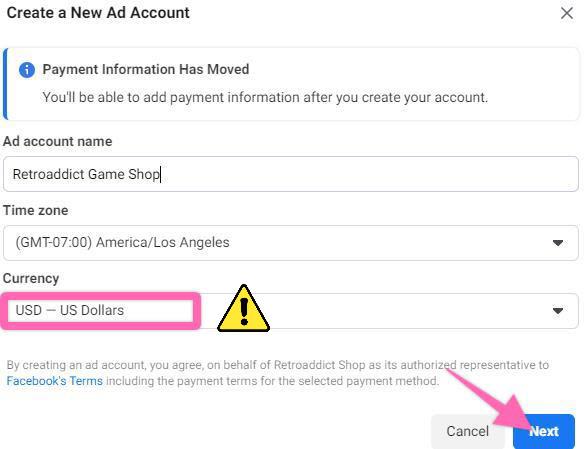
- Incorporate your new Ad Account’s details here:
Note: Since you cannot change this in the future, be careful while selecting the currency to be used for your account. If you’d like, you can always make a new advertisement account.
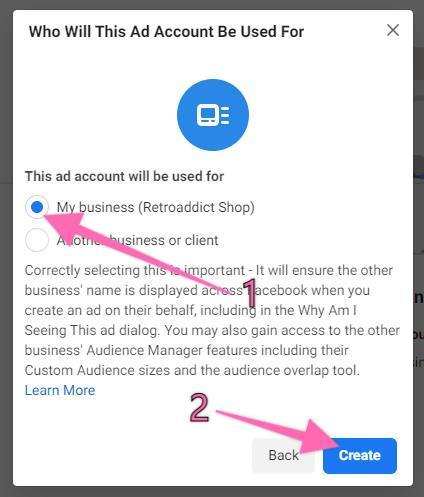
- Choose whether this ad account is being created for your company or to promote another company’s products.
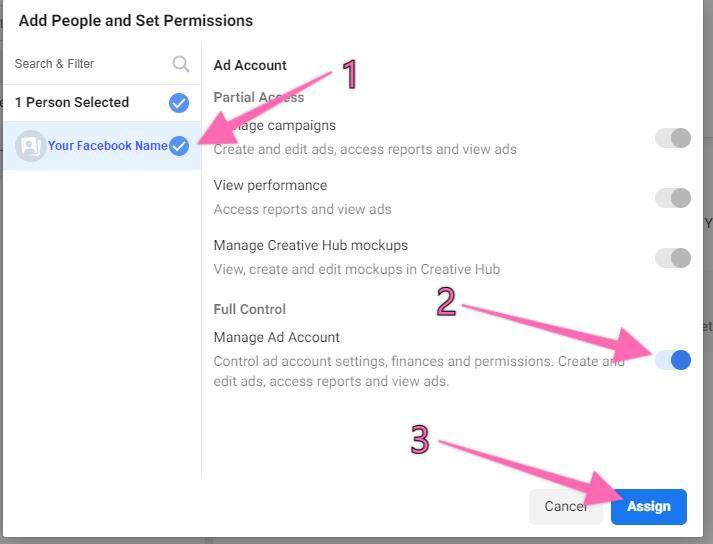
- You will now be asked to add users to your ad account; at this point, you will just need to add yourself.
- You may want to add contractors or workers to that Ad account later on.
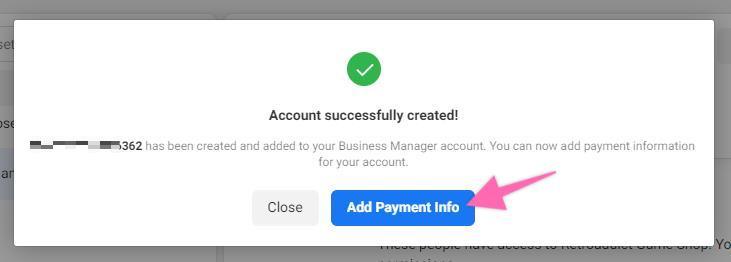
- Your advertising account has been set up! You should set up a payment method right away if you haven’t already. Select “Add Payment Information”:
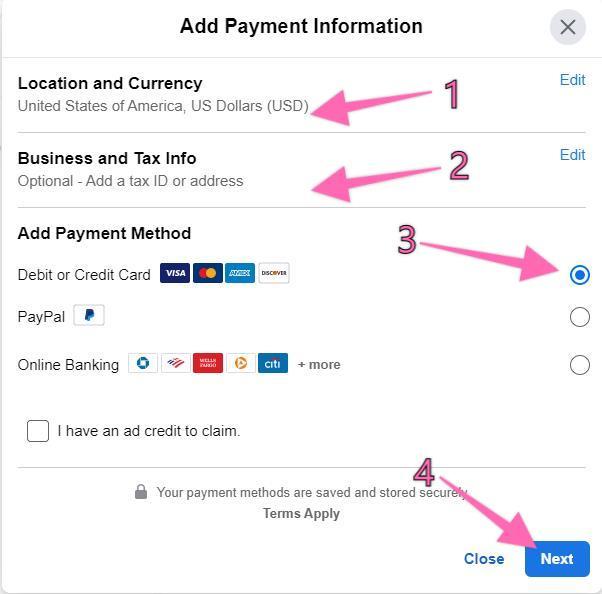
- Verify that your “Location and Currency” are accurate. You can then select your preferred payment method, provide your “Business and Tax Info” (optional), and click “Next”:
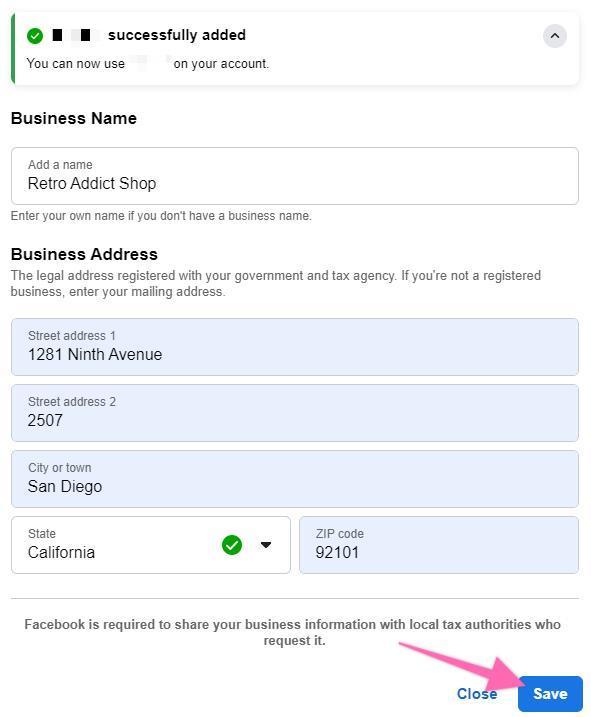
- You are now able to enter your business address details after successfully inputting your payment details.
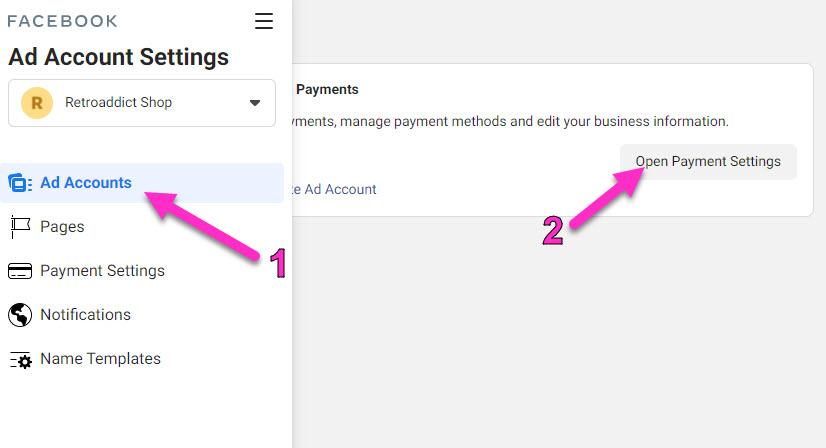
Examining Your Payment Preferences on Facebook
- Navigate to your Facebook Ad Account Settings and select “Open Payment Settings” under Business Payment
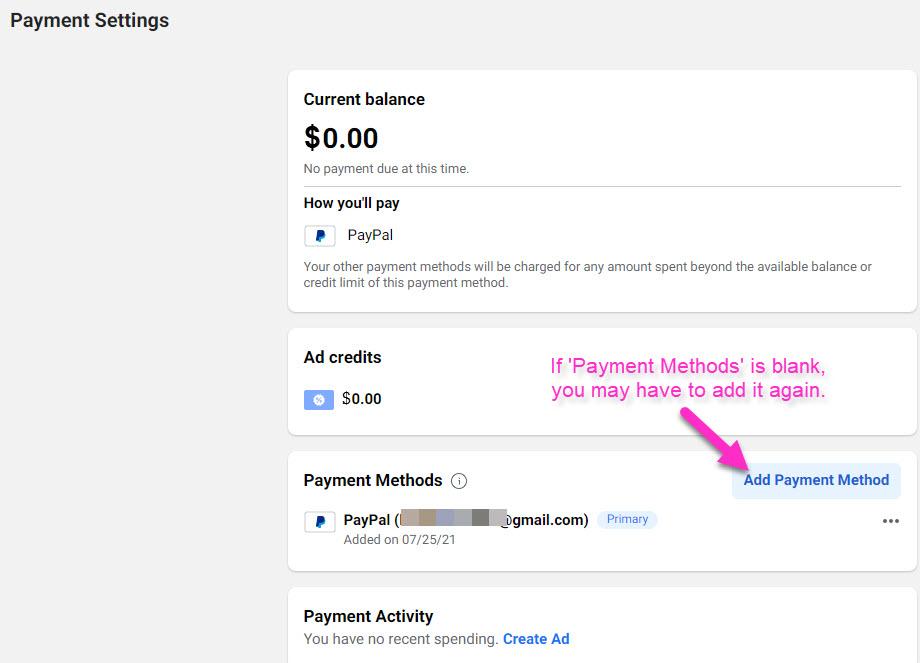
- Verify that the information under “Payment Method” is valid; if not, you may need to add it again, just like you did in Step #8.
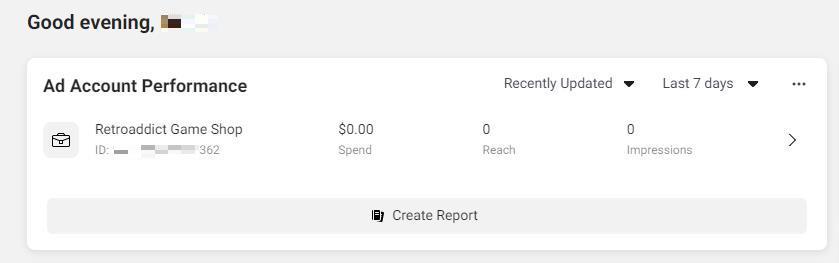
- And that’s it! You should now be able to view your new Facebook Ad Account if you navigate to your Business Manager Home page: