Objective: The goal of this guide is to assist you in seamlessly integrating the Snapchat pixel into your website, ensuring accurate tracking for your advertising campaigns.
Prerequisites:
- An active Snapchat Ad account
- Access to Google Tag Manager (GTM) set up on your website
If you lack a Snapchat Ad account, you can sign up here.
If GTM hasn’t been set up on your website, refer to the relevant SOP:
- SOP 004 (web version) for WordPress
- SOP 065 (web version) for Shopify
- SOP 066 (web version) for Squarespace
Importance: The Snapchat Pixel facilitates direct response goals, including lead generation, subscriptions, and product sales, enhancing the effectiveness of your advertising efforts on Snapchat.
Where and When:This setup process occurs within Google Tag Manager and Snapchat Ads Manager and should be completed before launching any Snapchat advertising campaign on your website. You only need to perform this setup once unless you’re running ads on multiple websites.
Who:This task is typically carried out by individuals responsible for website management, analytics, or paid advertising.
Setting Up:
Environment Setup:
- Open a new Chrome window with your Snapchat Ad and GTM accounts signed in.
- Download the Snapchat Pixel helper
Generating Snapchat Pixel:
- Sign in to Snap Ads Manager.
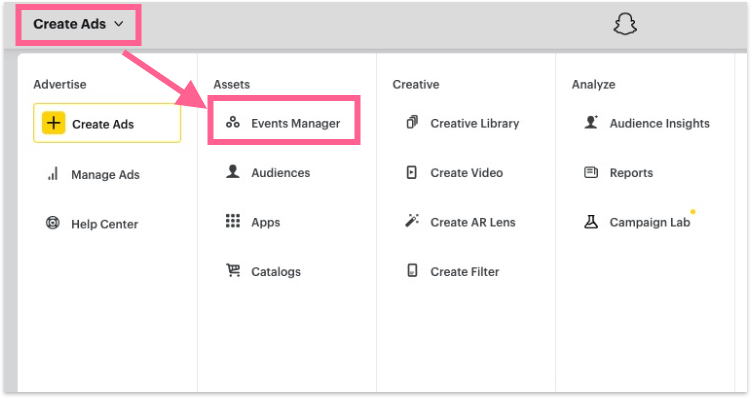
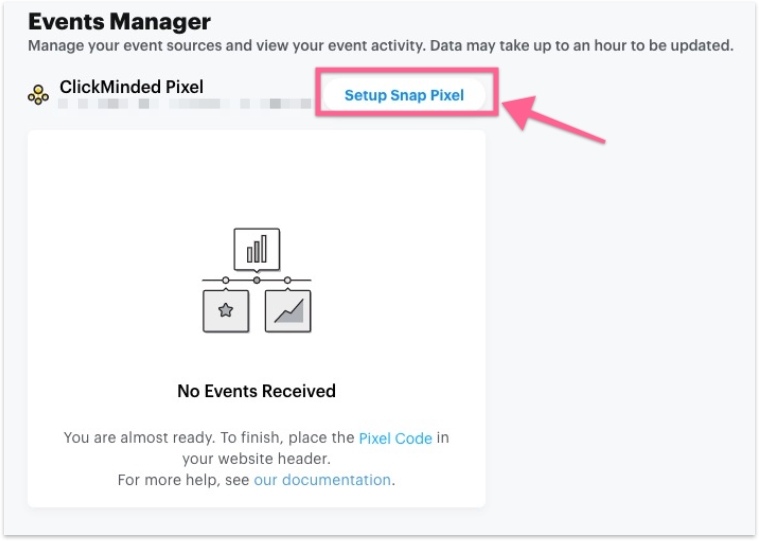
- Navigate to the menu and click on “Events Manager.”
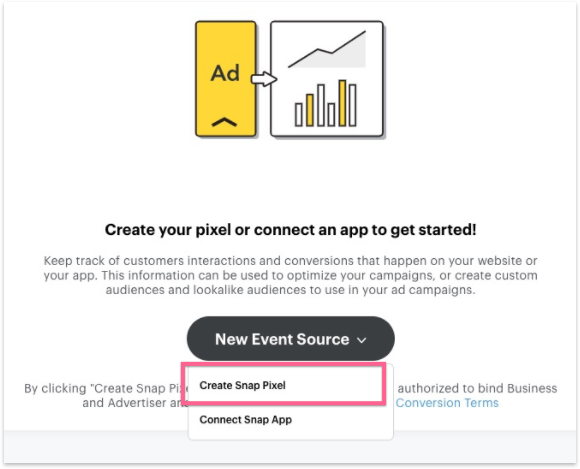
- Choose “New Event Source” and opt for “Create Snap Pixel.”
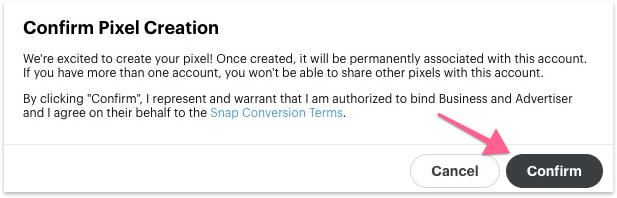
- Confirm Pixel creation.
- Refresh the page to view the new Pixel.
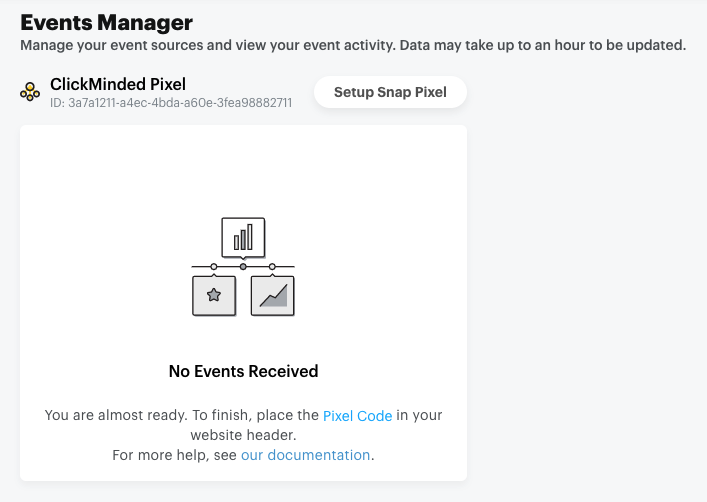
- Note: It might take a few minutes for the new Pixel to appear. If not visible, wait and refresh the page.
Copying Snap Pixel ID:
- In “Events Manager,” select “Setup Snap Pixel.”
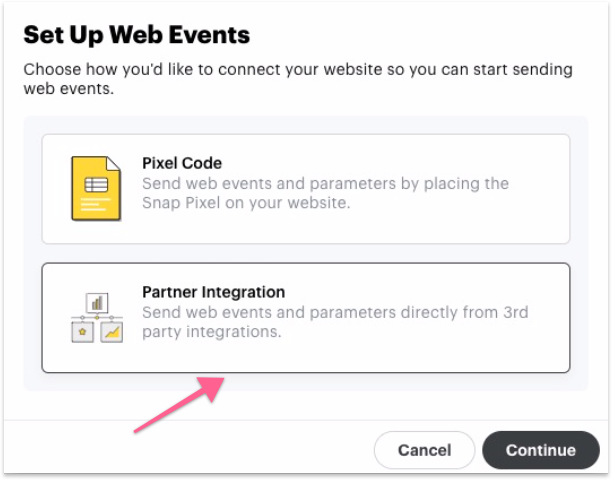
- Choose “Partner Integration” and proceed with “Continue.”
- Copy the Snap Pixel ID and store it in a notepad for later use.
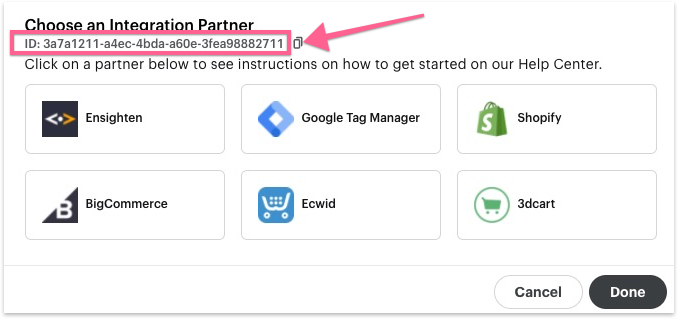
- Click “Done.”
Adding Snapchat Pixel via Google Tag Manager:
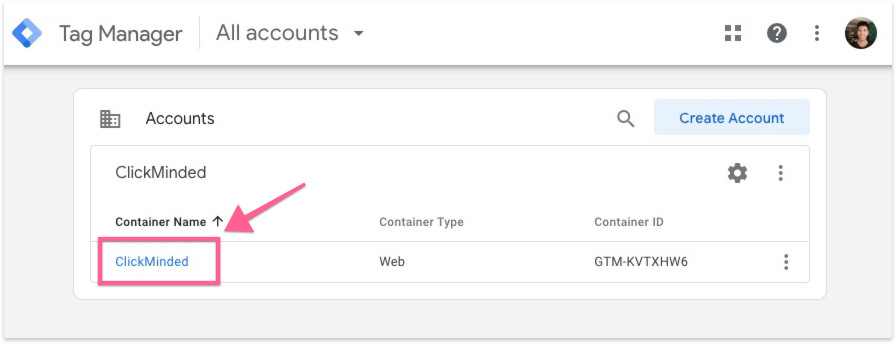
- Sign in to Google Tag Manager.
- Select the container where you want to add the Snapchat Pixel.
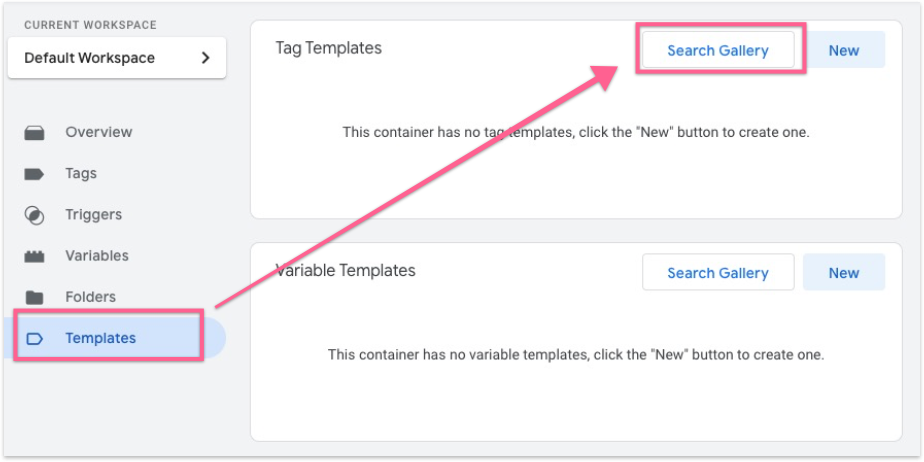
- Click on “Templates” and then “Search Gallery.”
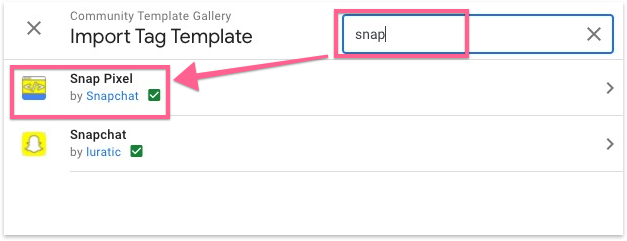
- Search for “Snap” and select “Snap Pixel by Snapchat.”
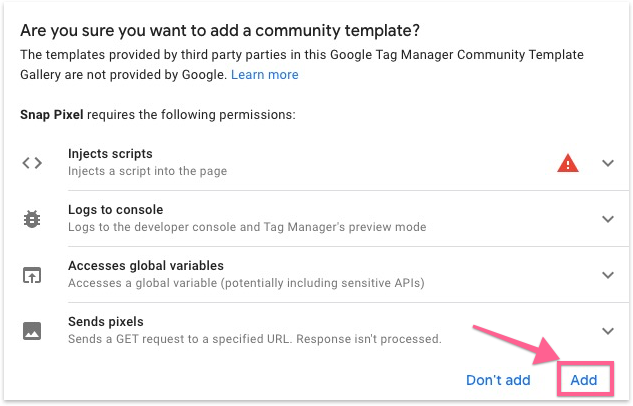
- Add Snap Pixel to the workspace.

- Confirm the addition when prompted.
- Note: A warning sign next to “Inject Scripts” is normal as Snapchat needs to insert a script (i.e., the Snap Pixel) on your website.
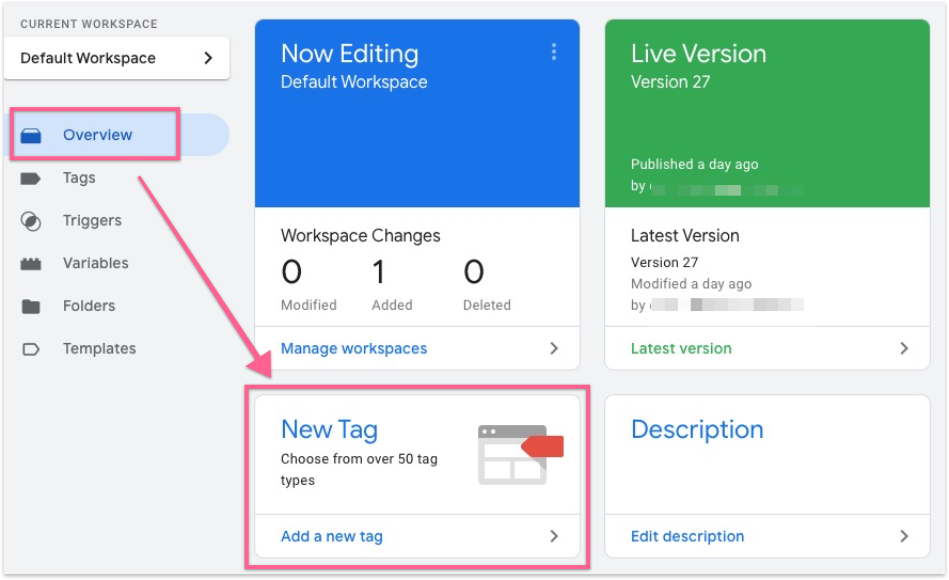
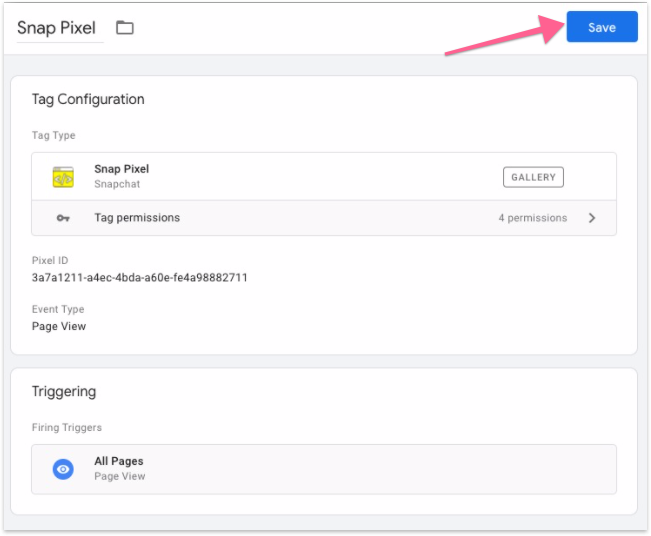
- Return to the GTM dashboard and click “New tag.”
- Rename the tag and click the tag icon.
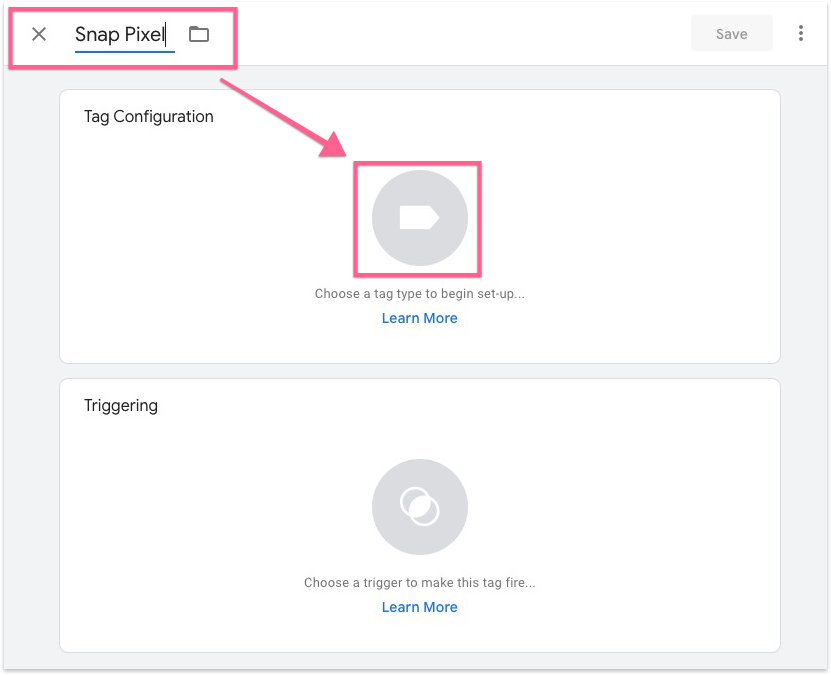
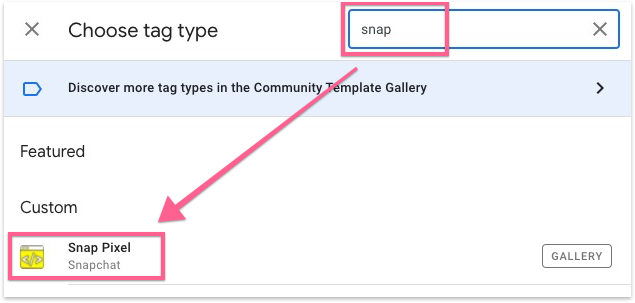
- Search for “Snap” and select “Snap Pixel.”
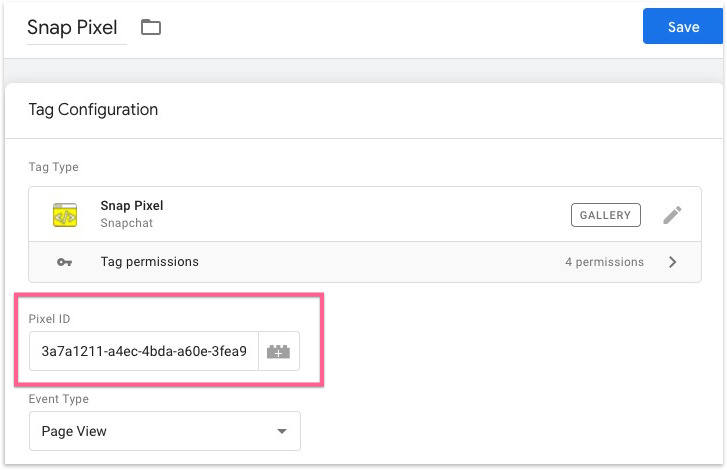
- Paste the Snap Pixel ID into the designated field and save.
- Click the trigger icon and select “All Pages” to ensure the Pixel fires on every page.
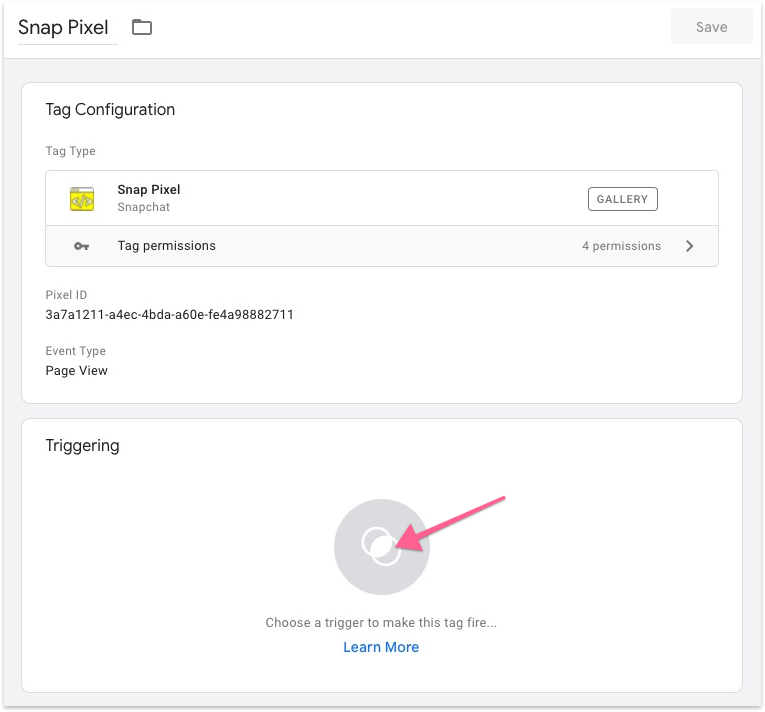
- Save the new tag.
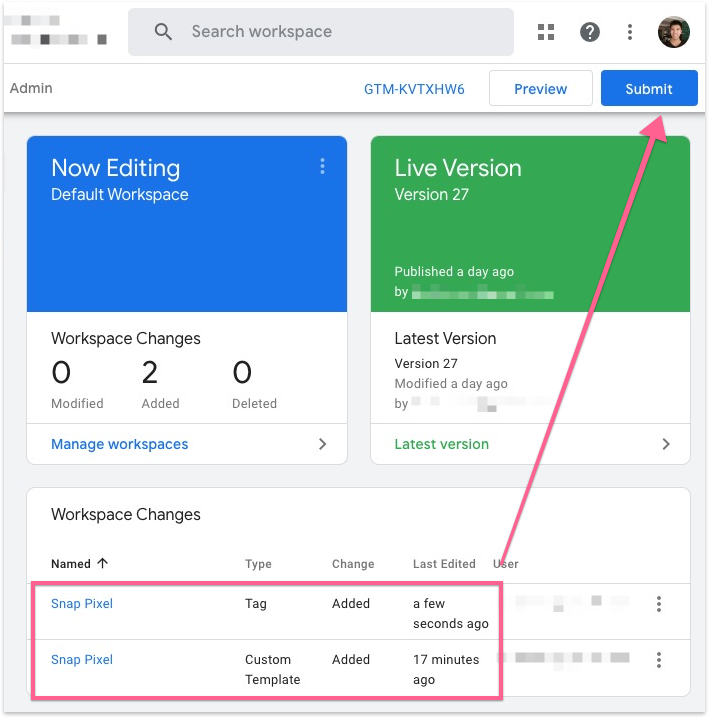
- Check and submit the changes in the GTM dashboard.
Verification:
- It takes a few minutes for GTM to fire the Snap Pixel.
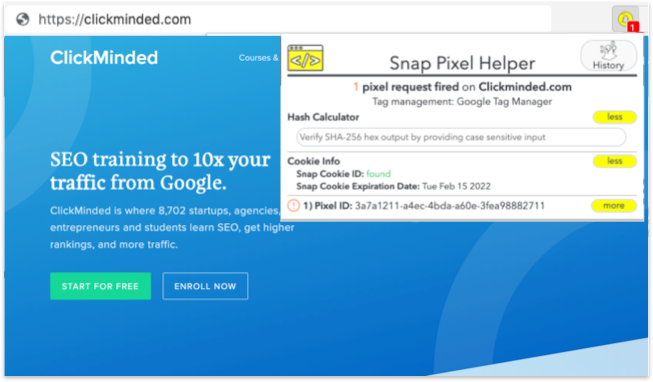
- Visit your website where the Snap Pixel is implemented.
- Use the Snap Pixel helper in your Google Chrome toolbar to verify the Pixel is firing.
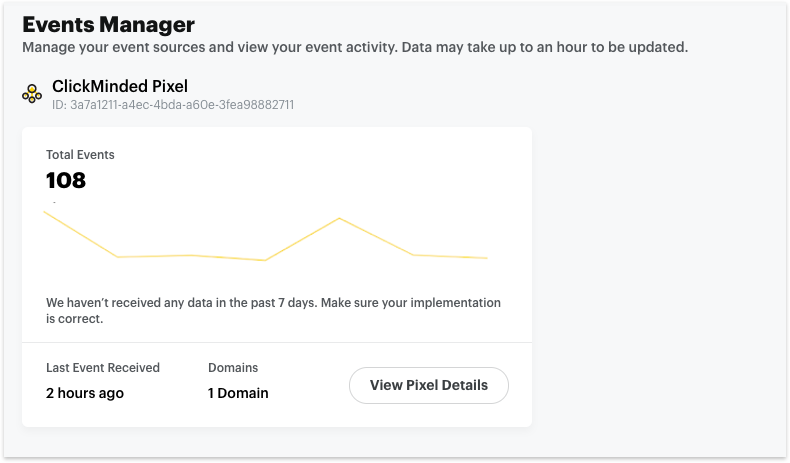
- Check Snapchat Events Manager to confirm page view metrics are being tracked.
- Note: Pixel data may take up to an hour to update.
-
Conclusion:
Congratulations! You have successfully installed the Snap Pixel on your website. With page views now being tracked accurately, you can proceed to set up tracking for other metrics such as add to cart and purchase events.