Goal
Receive email notifications when web metrics change significantly.
Ideal Outcome
A meaningful set of metrics is consistently monitored, and alerts are sent when any metrics require further attention.
Prerequisites or Requirements
N/A
Importance
Manually monitoring every single metric every day is not productive and often impossible due to time constraints. Automated alerts allow you to focus on critical changes that require immediate action.
Applicability
The specific steps apply to Universal Google Analytics (not Google Analytics 4). If you created your Google Analytics account before October 2020, you likely have a Universal Analytics property.
Where
In Google Analytics.
When
Review your alerts quarterly or whenever you need to monitor a new KPI.
Who
The person responsible for web analytics in your business.
SOP Update: Google Analytics 4
Note: On July 1, 2023, standard Universal Analytics properties will no longer process data. New data will only flow into Google Analytics 4 properties.
Steps for Setting Up Alerts in Universal Analytics
1. Open Click Minded SOP Library
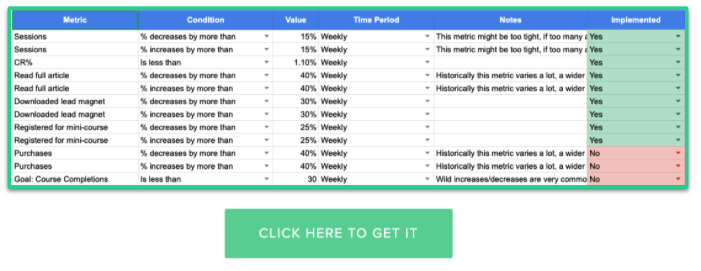
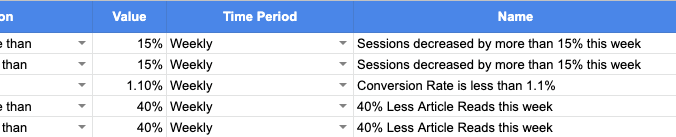
- Open the Click Minded SOP Library | Google Analytics Alerts Planning spreadsheet.
- Go to “File → Make a copy” and save a copy to your drive.
2. Identify Core KPIs
Determine the core KPIs you want to monitor. Examples include:
- Sessions (e.g., X% increase/decrease in traffic)
- Bounce Rate (e.g., X% increase from organic search)
- Page Views (overall or specific pages)
- Average Page Load Time
- (Goal/Ecommerce) Conversion Rate
- Revenue
- Transactions
- Average Order Value (AOV)
- Custom Events (e.g., 404 pages, CTA clicks, downloads)
3. Determine Alert Frequency and Conditions
- Frequency: Decide if the alert should be daily, weekly, or monthly based on KPI stability.

- Conditions: Choose conditions like “Less/Greater than X” or “% Increases/Decreases by more than X.”
4. Set Up Alerts in Google Analytics (Universal Analytics)
- Log into Google Analytics
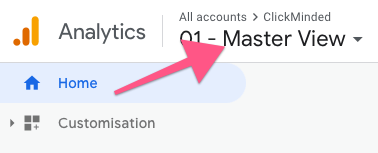
- Ensure you are on the correct account and property.
- Navigate to Custom Alerts
- Go to Admin > Custom Alerts.
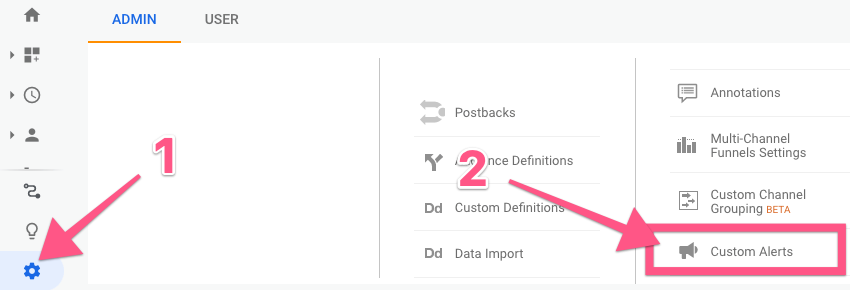
- Create New Alert
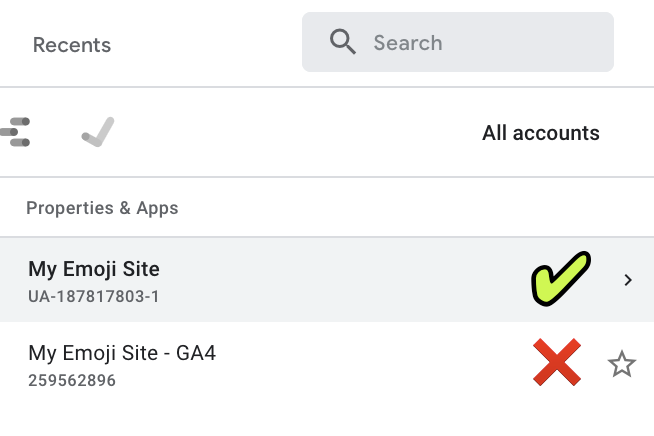
- Make sure you select the Universal Analytics property (Property ID starts with UA-).
- Open the Click Minded SOP Library | Google Analytics Alerts Planning spreadsheet and start setting up your alert.
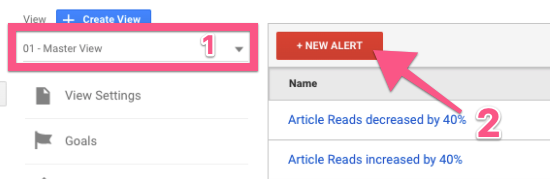
- Alert Details
- Alert Name: Descriptive name for the alert.
- Apply to: Select the appropriate reporting views.
- Period: Daily, weekly, or monthly.
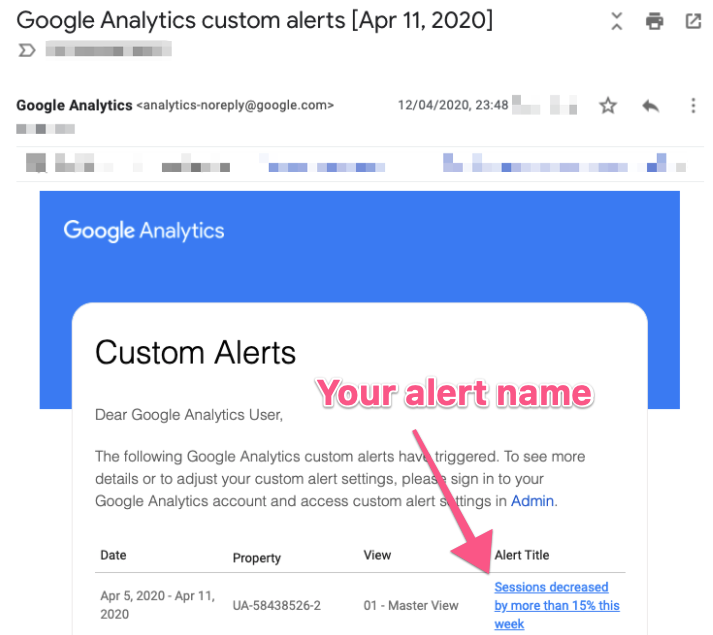
- Send Email: Tick the box to receive emails and add any other recipients.
- Alert Conditions:
- This applies to: Dimension (e.g., “All Traffic”, “Country”).
- Alert me when: Metric (e.g., “Sessions”, “AOV”).
- Save Alert
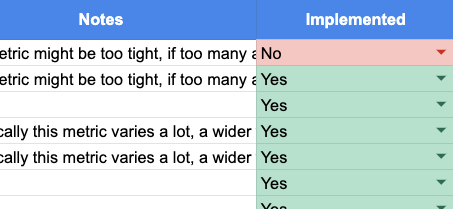
- Click ‘Save Alert’ and mark it as ‘Implemented‘ in your planning spreadsheet.
![]()
Steps for Setting Up Alerts in Google Analytics 4
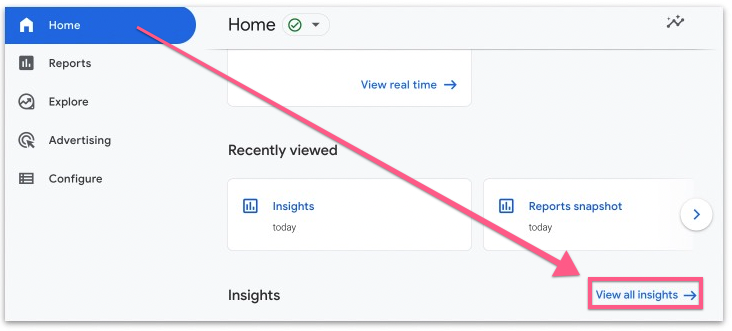
1. Log into Google Analytics 4
- Home Page
- Scroll to the bottom and click “View all insights.”
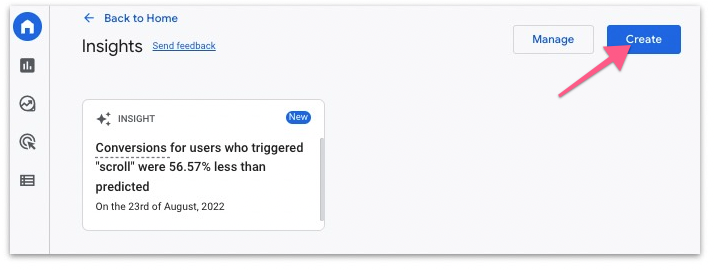
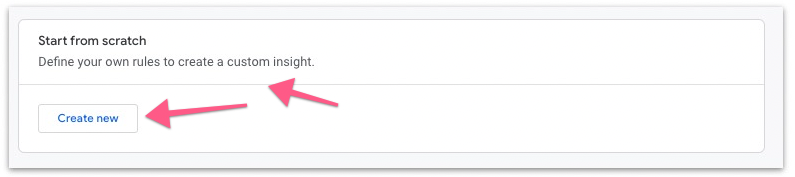
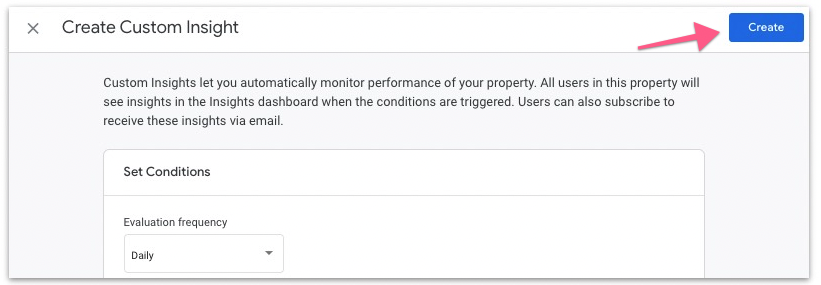
- Create Insight
- Click “Create” then “Create new” in the “Start from scratch” section.
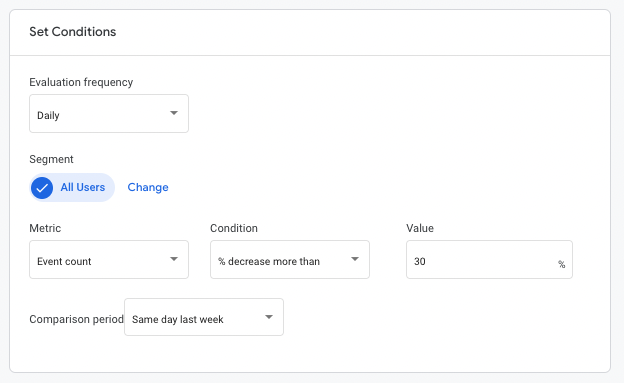
- Set Conditions
- Frequency: Choose daily, weekly, or monthly.
- Metrics: Select important site metrics (e.g., conversions, revenue, page views).
- Conditions: Define conditions for alerts (e.g., page views decrease by 30% compared to last week).
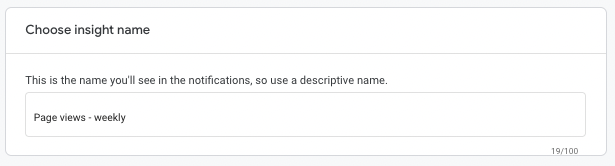
- Name and Notification
- Set a descriptive name for the insight.
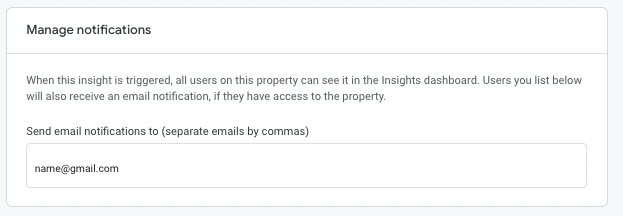
- Enter the email address for notifications.
- Create Insight
- Click “Create” from the top corner.
Now, you’ve successfully set up alerts to monitor key website metrics.