")
Setting up conversion goals in Google Analytics is crucial for tracking and reporting your website’s conversions effectively. This guide provides a comprehensive step-by-step process to ensure all your goals are correctly configured and reported, offering valuable insights into user actions that drive business growth.
Key Takeaways
- Accurately track and report website conversions using Google Analytics.
- Configure various conversion types, including lead signups, purchases, and button clicks.
- Utilize Google Tag Manager for easier implementation of certain goals.
- Ensure the correct setup in Universal Google Analytics for comprehensive tracking.
- Gain valuable insights into user behavior and optimize business strategies accordingly.
Goal
To have all your website conversions tracked and reported in Google Analytics.
Ideal Outcome
Your Google Analytics setup has all your Goals configured and being correctly reported.
Prerequisites or Requirements
Some types of Goals are more easily implemented with Google Tag Manager running on your website. If you don’t have Google Tag Manager running on your site yet, you can follow the steps described in the Article. You also need to have Google Analytics on your website; if you don’t have it yet, you can follow the steps described in Guides.
The specific steps in this article apply only to Universal Google Analytics (not Google Analytics 4). If you followed other Click Minded guides to create your Google Analytics account or set it up before October 2020, you likely have a Universal Analytics property.
Why This Is Important
No matter what your business is, knowing if your users are performing actions that allow your business to grow, and which users are most likely to perform them, is vital to your success and optimization strategy.
Where This Is Done
In Google Tag Manager and Google Analytics.
When This Is Done
When you want to track a new Goal.
Who Does This
The person is responsible for website management or analytics.
Article Update: Google Analytics 4
Note: On July 1, 2023, standard Universal Analytics properties will no longer process data. You’ll be able to see your Universal Analytics reports for a period after July 1, 2023. However, new data will only flow into Google Analytics 4 properties.
We’ve updated this article to reflect the latest change in Google Analytics. Before starting this article, select one of the following:
- If you’re using a Google Analytics 4 property, follow this guide instead: Set up and track custom events in Google Analytics 4.
- If you’re still using Universal Analytics, follow the steps below to get started:

About this Guide
This guide will go over the process of tracking five types of conversions that should cover most of your needs:
- Lead Signup
- Purchase
- Button Click
- Session Time
- Pages / Session
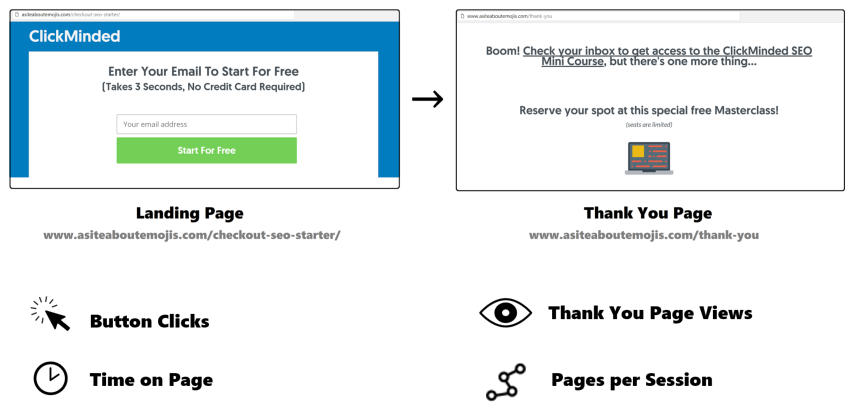
It assumes a “Thank You” page exists for some of the goals. A “Thank You” page is a page on your website where users are redirected after completing the desired conversion action (e.g., a purchase, newsletter signup, etc.).
Deciding Which Conversion Tracking Method Is Better for You
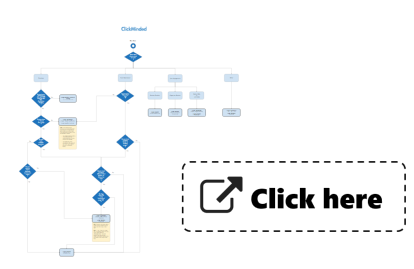
This guide covers two methods of setting up your Goals: using Google Tag Manager and not using Google Tag Manager.
In some cases, you can use one method or another depending on your personal preferences or how you set up your tools. If you are unsure about which method is more appropriate for you, you can follow this diagram:
Examples:
- Tracking form sign-ups using Google Tag Manager’s “Form Submission” trigger instead of a “Submit button” click or a “Thank You” pageview.
- Tracking form sign-ups without “Thank You” pages or coded events but instead using the “Element Visibility” trigger for a specific element that only appears upon successful form submission.
Setting Up Google Analytics Goals Using Google Tag Manager
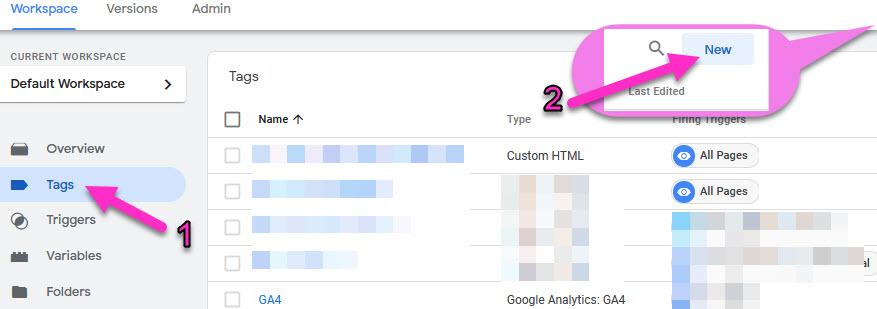
Step 1: Access Google Tag Manager
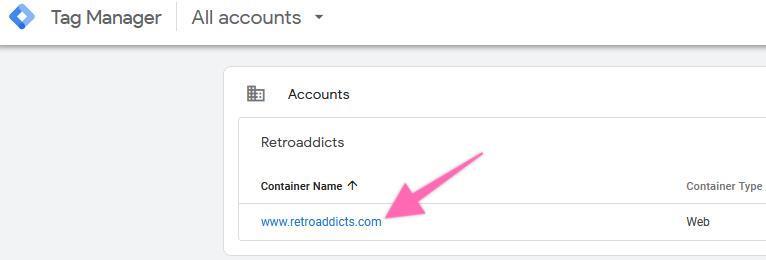
Go to Google Tag Manager and select the account and container for the website you want to work on.
Step 2: Create a New Tag
In the sidebar, click on ‘Tags’ → ‘New’ and rename your tag. Under “Tag Configuration”, click “Choose a tag type to begin set-up” and select “Google Analytics: Universal Analytics”.


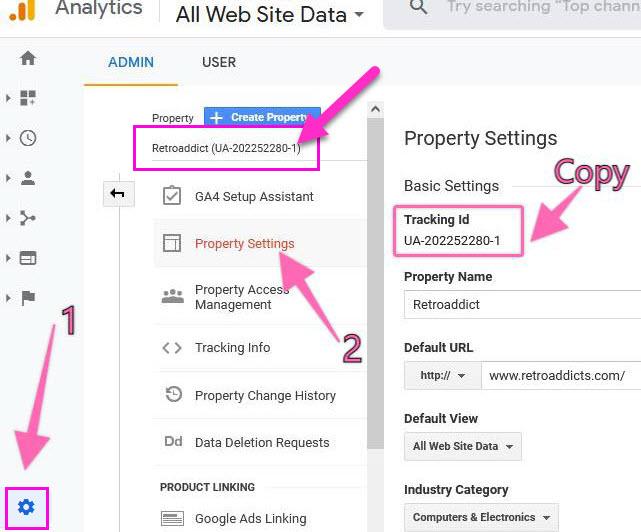
Step 3: Configure the Tag
- Select your Google Analytics ID variable or enter your Google Analytics Tracking ID directly.
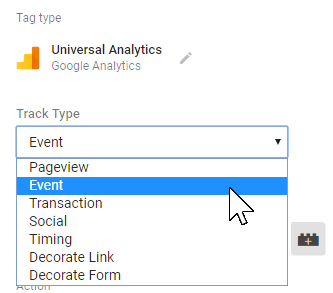
- On the “Track Type” dropdown, select “Event”.
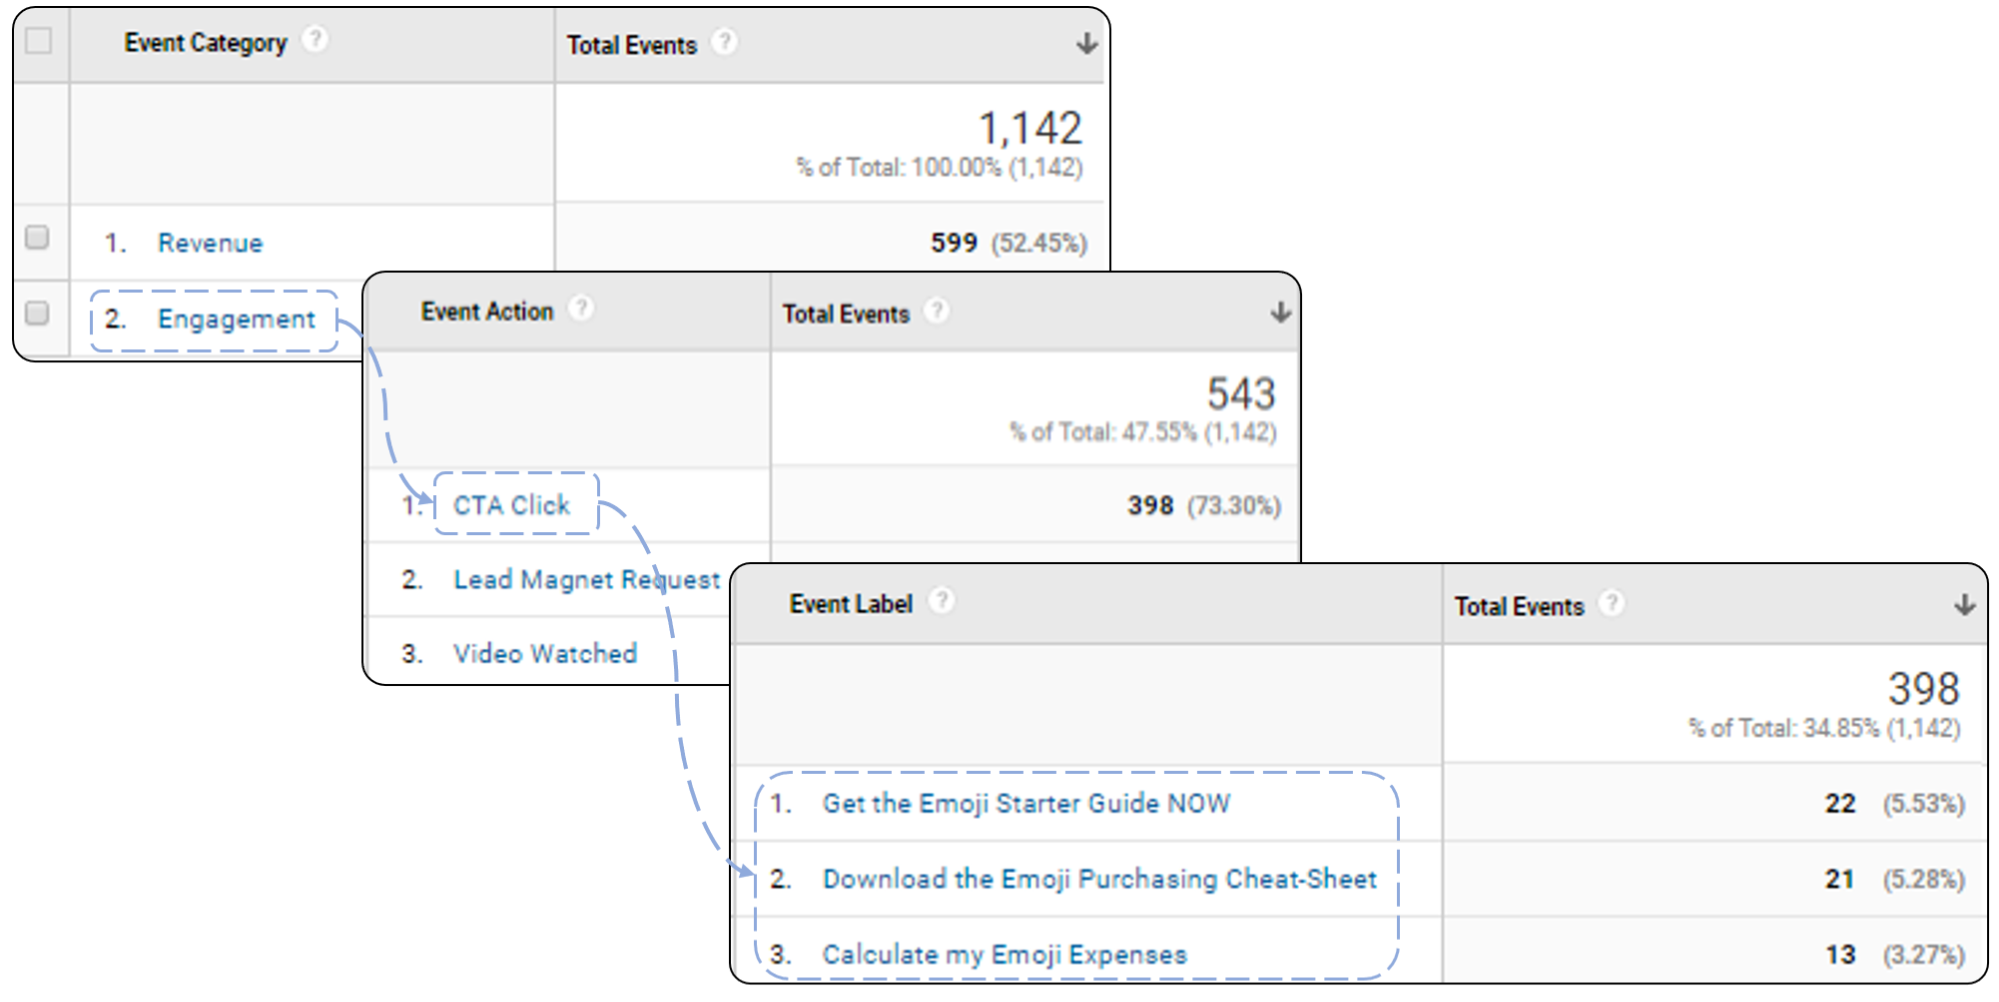
- Enter the Category, Action, and Label for the event you want to track.
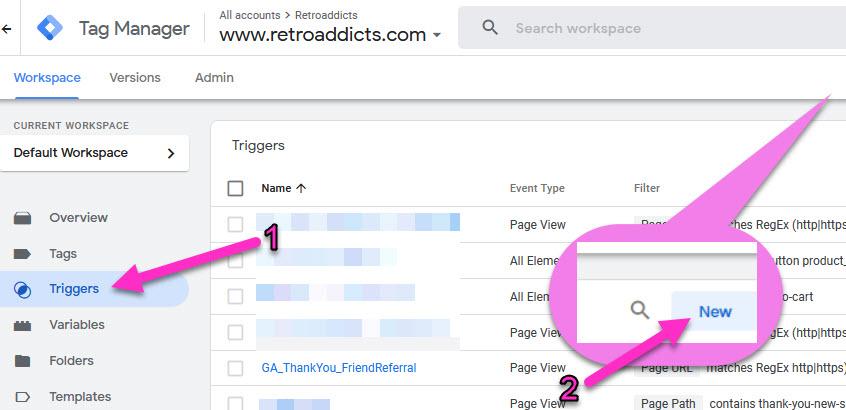
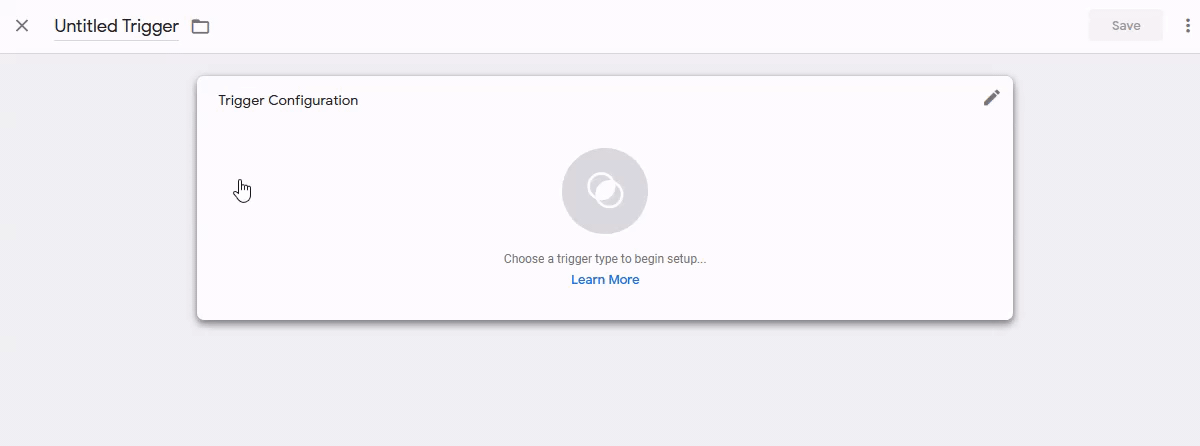
Step 4: Set Up the Trigger
- Scroll down to ‘Triggering,’ click the interlocking circle’s icon, then click the ‘+’ icon to add a new trigger.
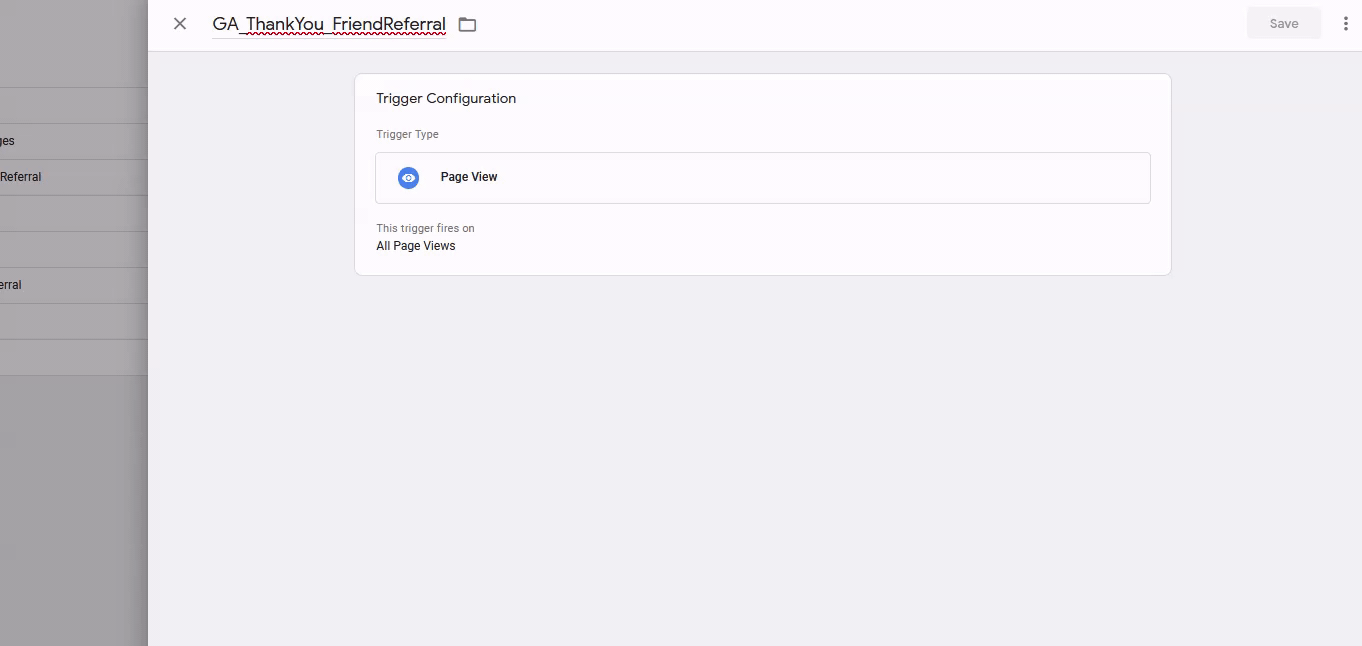
- Rename your trigger and select ‘Page View’ or ‘Click’ depending on the type of event.

Example: Page View Trigger
- Choose ‘Page View’ → ‘Some Page Views’.’
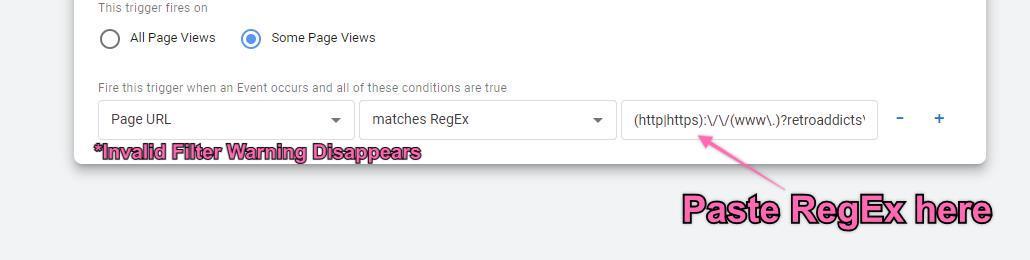
- Build a RegEx that matches the URL where you want your goal to fire.
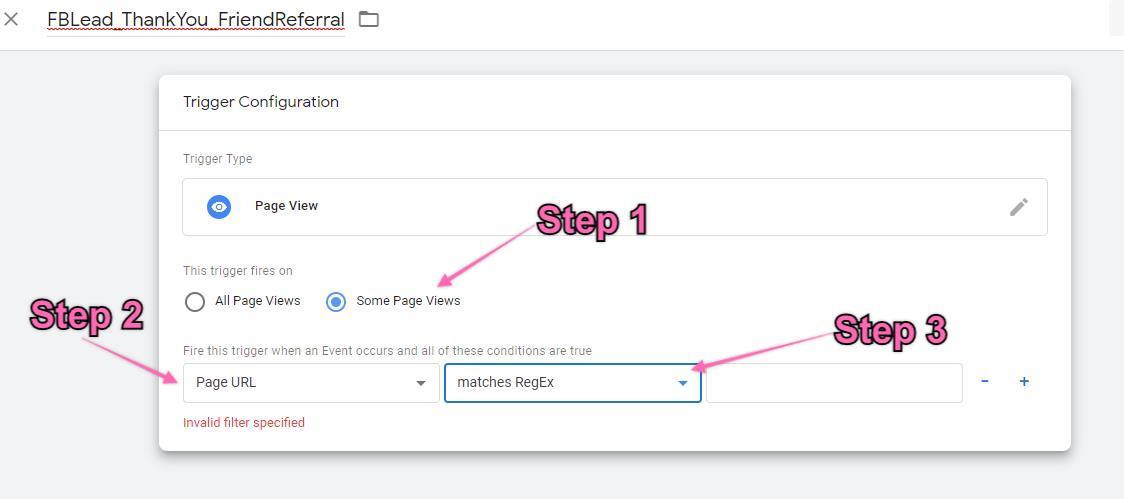
- Insert your RegEx in the last field and click ‘Save’.
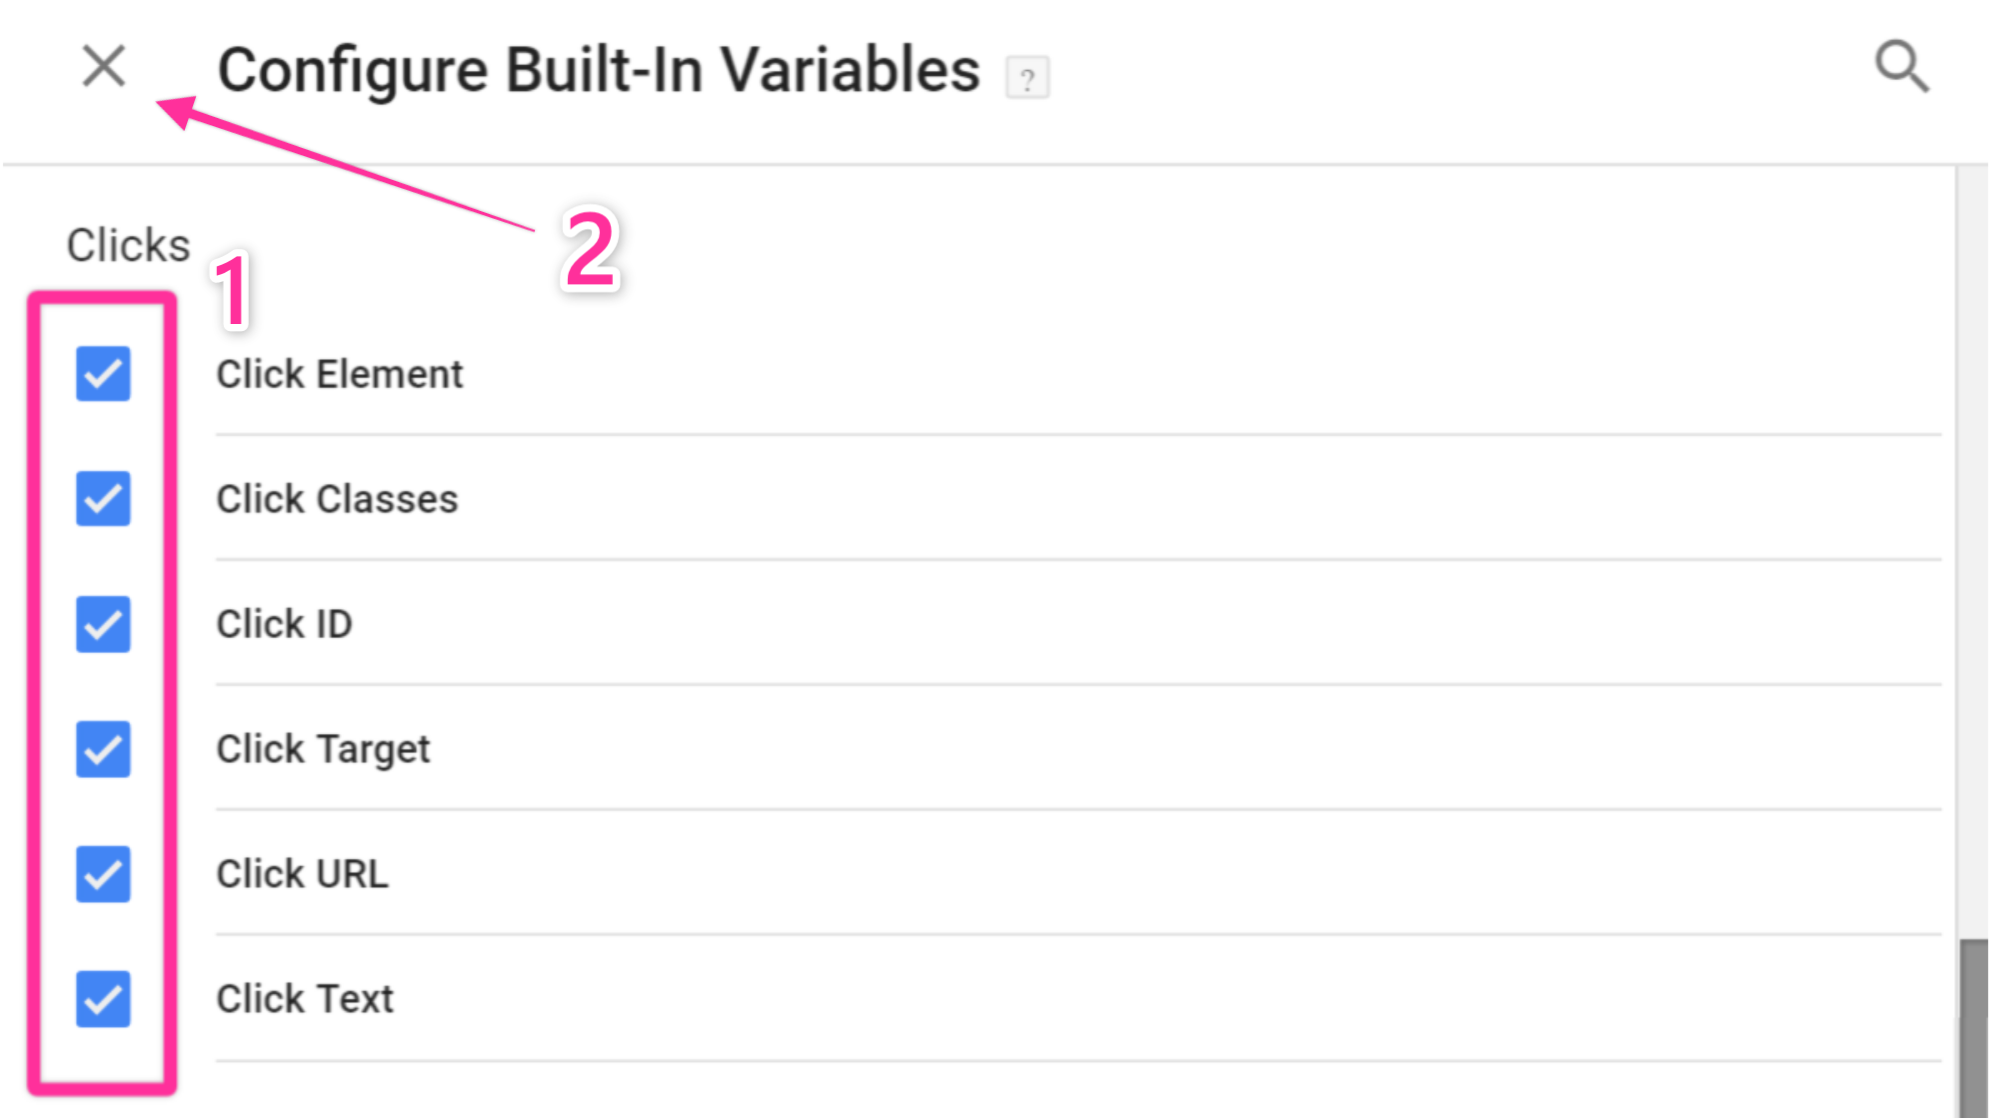
Example: Click Trigger
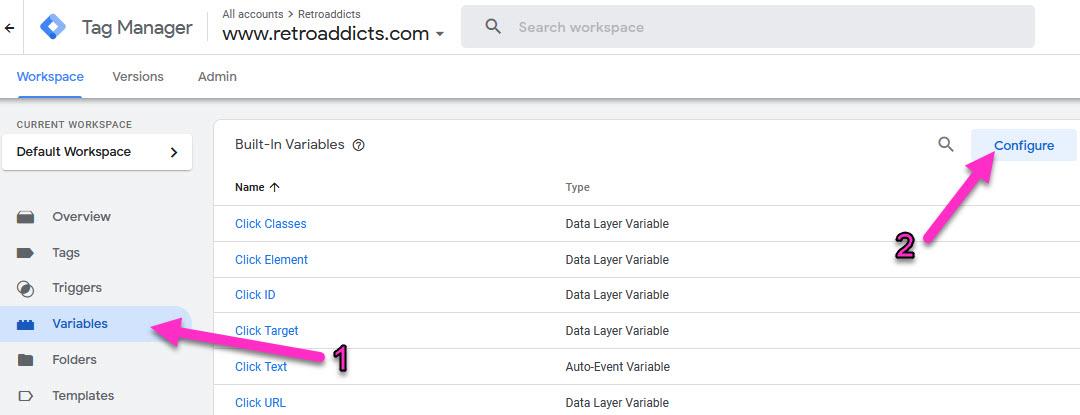
- In the Tag Manager workspace, click ‘Variables’ → ‘Configure’ and select all the variables under ‘Clicks’.
- Create a new trigger for the Click Event by performing the required action and noting the variables.
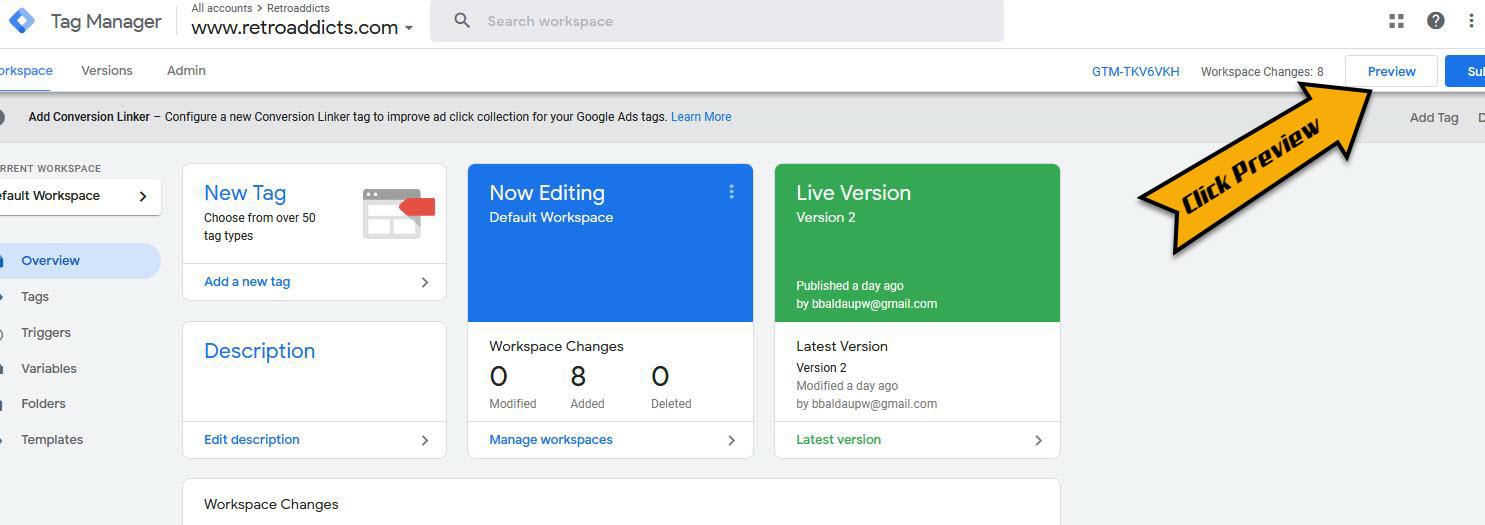
Step 5: Publish the Container
- Click ‘Submit’ in the top right corner to publish the changes.
- Verify the changes in Preview mode to ensure the trigger fires correctly.
Configuring Goals in Google Analytics
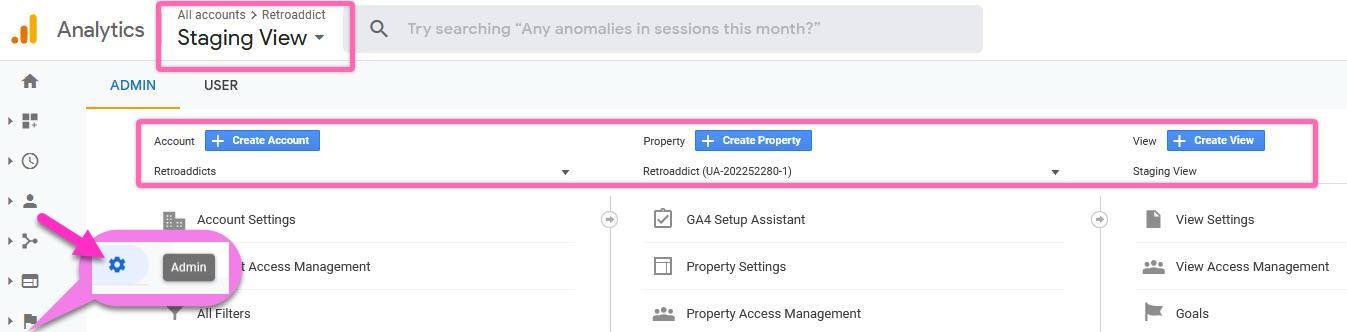
Step 1: Open Google Analytics
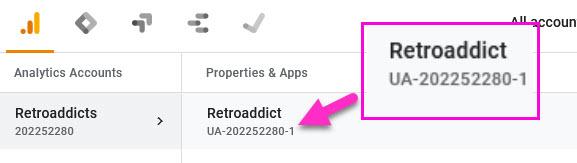
Open your Google Analytics account settings. Select the correct Account, Property, and View.
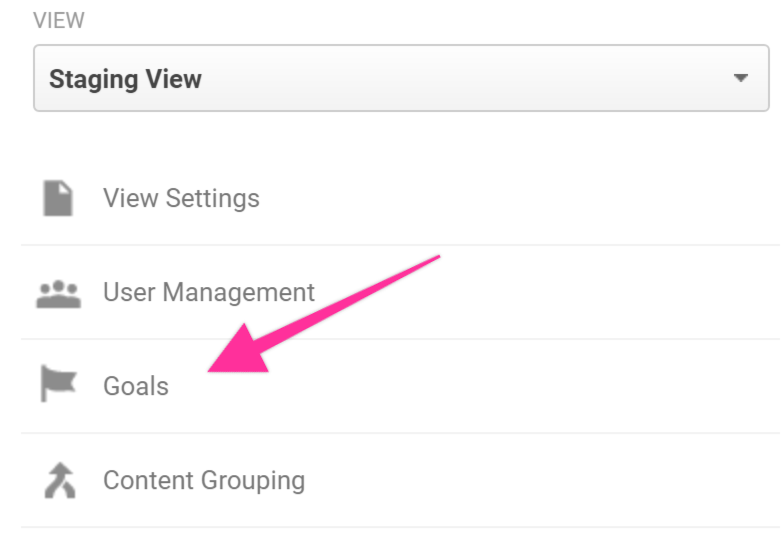
Step 2: Create a New Goal
- Click ‘Admin’ → ‘Goals’ → ‘New Goal’.
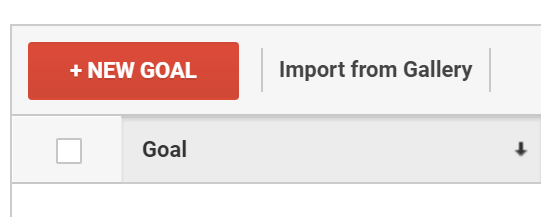
- Select ‘Custom’ and click ‘Continue’.
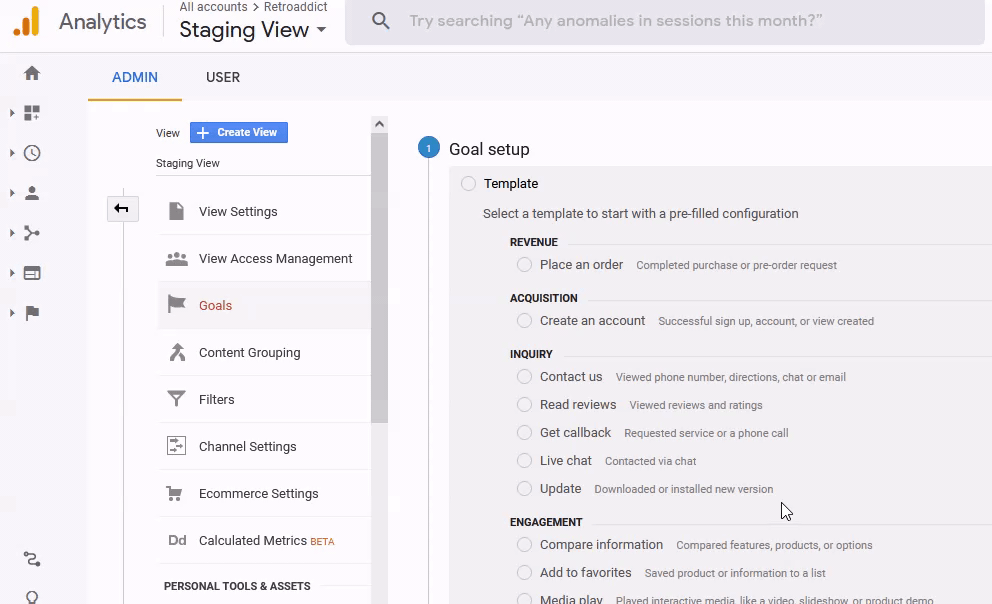
Step 3: Configure the Goal
- Enter the Goal description (e.g., “Lead Signup”).
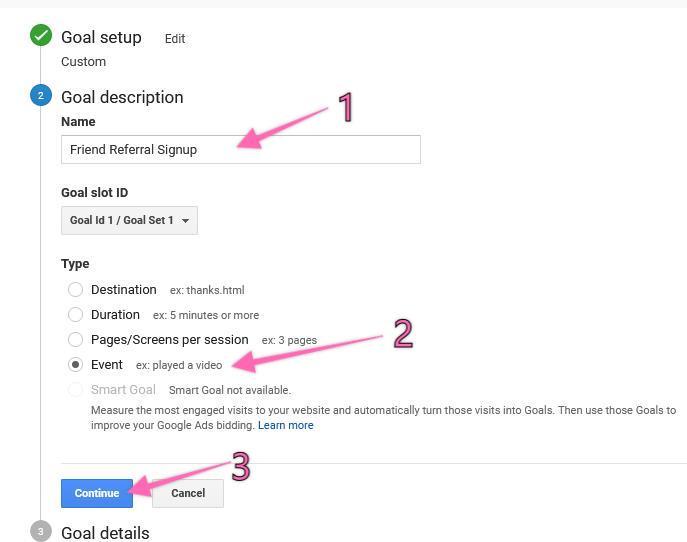
- Select the type of Goal (e.g., ‘Event’).
- Enter the same values for the Category, Action, and Label that you used in Google Tag Manager.
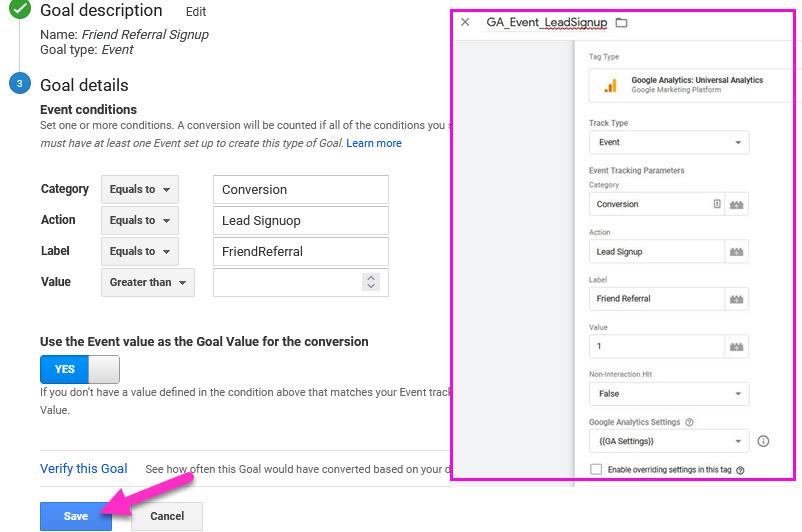
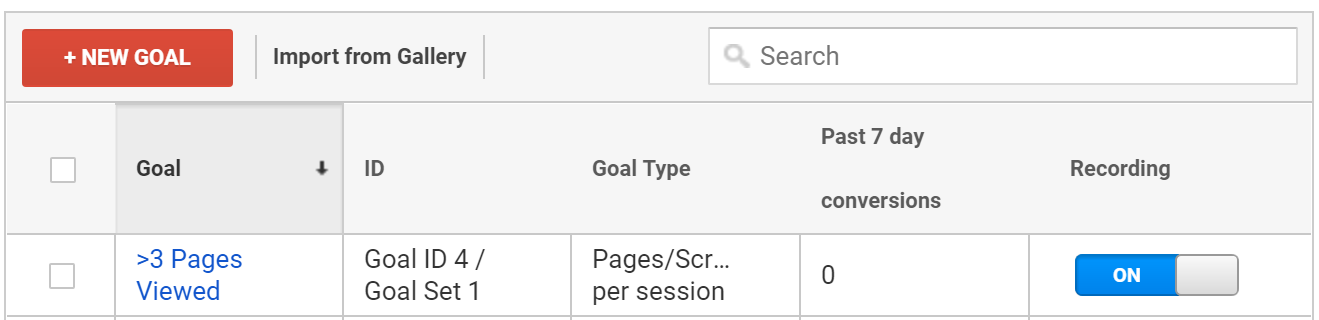
- Click ‘Save’ and ensure the “Recording” toggle is set to “On”.
Testing Your Google Analytics Goals
- Open your website using Chrome and click on the Google Tag Assistant (Legacy) Chrome extension to record your actions.

- Perform the required action to trigger your conversion and verify the results in Google Tag Assistant.
By following these steps, you can ensure that all your website conversions are tracked and reported accurately in Google Analytics. This comprehensive guide will help you set up and manage your Goals efficiently, providing valuable insights for your optimization strategies.