How to Empower your team with seamless access to your Google Analytics property while maintaining control over permissions. This guide demystifies the process of granting and revoking access, ensuring smooth collaboration without compromising security. Whether you’re adding a new team member or adjusting roles, these steps streamline user management, enabling efficient data sharing and analysis.
Goal
The goal of this guide is to help you grant access to your Google Analytics property (website) to a new user (employee, contractor, or agency) and revoke access when necessary.
Ideal Outcome
Your employee, contractor, or agency will have access to your Google Analytics account, enabling collaboration.
Prerequisites
To follow this guide, you need admin access to a Google Analytics account. If you have not created a Google Analytics account, refer to SOP 009: Adding Google Analytics to a site.
Why Granting Access is Important
Google Analytics allows you to grant access to other users so you can share your data securely. This enables collaboration without sharing your login details.
Where This is Done
The process is carried out in Google Analytics.
When This is Done
You should grant or revoke access whenever you need to manage user permissions for your Google Analytics property.
Who Should Do This
The person responsible for managing access to your Google Analytics or web analytics should perform these steps.
User Roles in Google Analytics
User roles in Google Analytics are divided into four categories:
- Manage Users: Can manage account users (add/delete users, assign permissions).
- Edit: Can perform administrative and report-related functions (create/edit/delete accounts, properties, views, filters, goals, etc.).
- Collaborate: Can create and share personal assets and collaborate on shared assets (e.g., dashboards, annotations).
- Read & Analyze: Can view reports and configuration data, and manipulate data within reports
- (e.g., filter a table, add a secondary dimension).
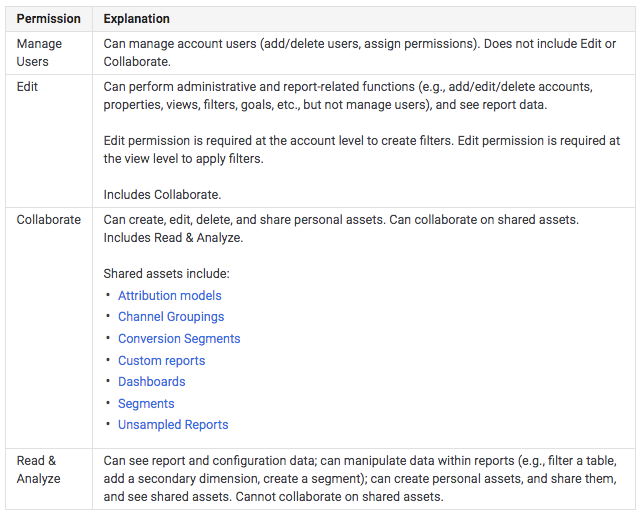
For more details, refer to the Google Support page.
Granting Access to Google Analytics
Steps
- Sign in to Google Analytics:
-
-
- Go to Google Analytics and sign in to your account.
-
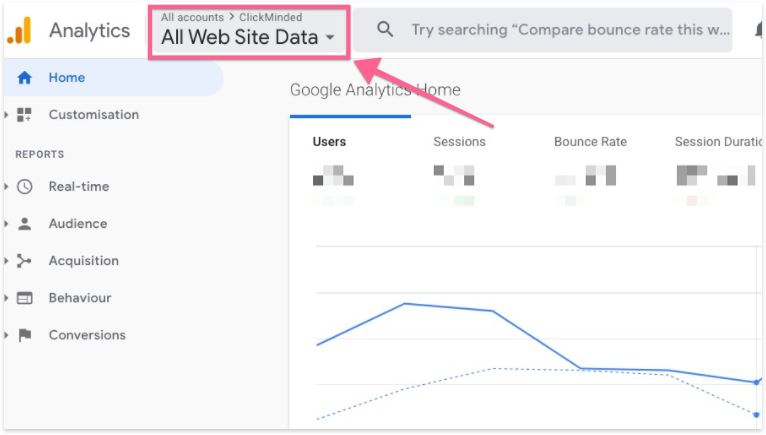
- Select the Correct Account:
-
- Ensure you are in the correct account by selecting it from the top menu.

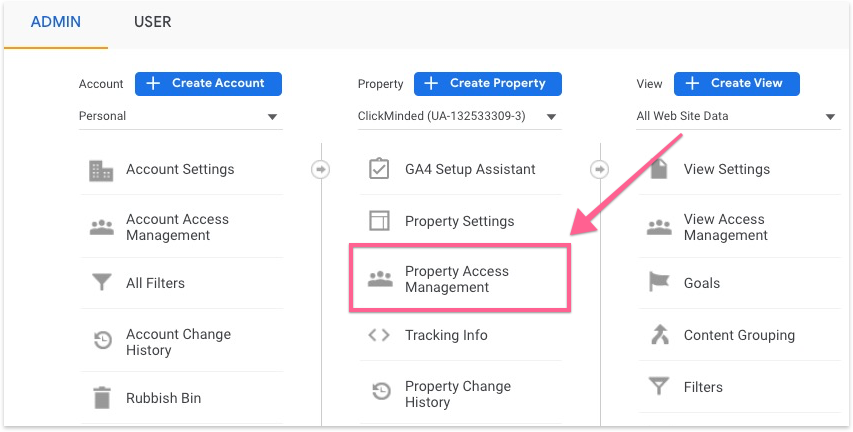
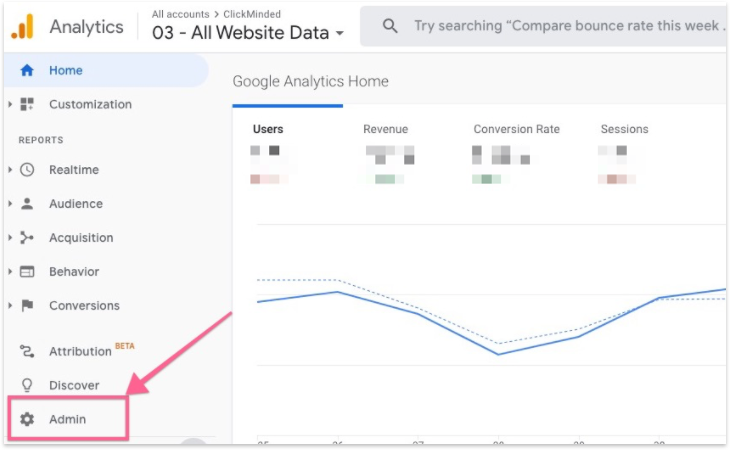
- Navigate to Admin:
-
- On the left sidebar, click “Admin”.

- Property Access Management:
-
- In the admin dashboard, click “Property Access Management”.
- Note: Granting a user access to a property will also grant access to all views for that property.
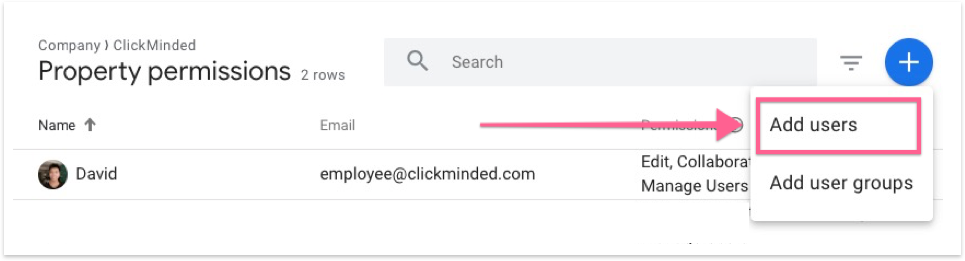
- Add Users:
-
- Click the “+” in the top right corner and select “Add users”.
- Enter User Email and Select Permissions:
-
- Enter the email address of the person you want to grant access to. Ensure the email address is a Google account.
- Select the appropriate permissions for the new user.
- Click “Add”.

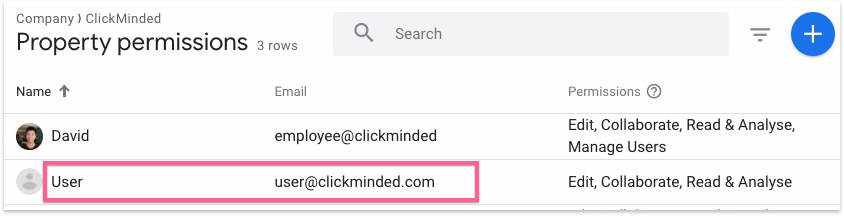
- Confirmation:
-
- You will now see the new user added with permission to access and collaborate on your Google Analytics account.
Removing Access to Google Analytics
Steps
- Sign in to Google Analytics:
-
-
- Go to Google Analytics and sign in to your account.
-
- Select the Correct Account:
-
- Ensure you are in the correct account by selecting it from the top menu.
- Navigate to Admin:
-
- On the left sidebar, click “Admin”.
- Property Access Management:
-
- In the admin dashboard, click “Property Access Management”.
- Remove Users:
-
- For each user you want to remove, click on the three dots menu next to their name and select “Remove access”.
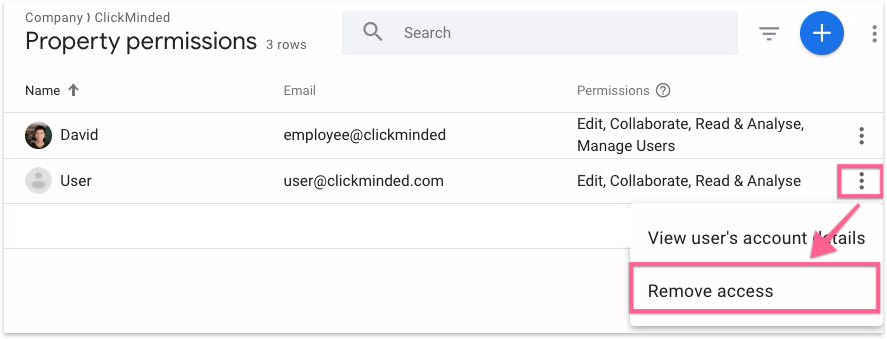
- Confirmation:
- The user’s access will now be removed.
By following these steps, you can efficiently manage user access to your Google Analytics account, ensuring secure and controlled collaboration.